When it comes to leather gloves, there is no better way to customize their look and make them truly unique than by dyeing them. Dyeing your leather gloves can not only add vibrancy and color to any wardrobe, but it also allows you to express your personal style and creativity. Imagine the endless possibilities of creating a fashion statement that is truly one-of-a-kind.
So, if you’re looking to elevate your leather gloves game and make a fashion statement that is uniquely yours, why not give dyeing a try? With a little bit of time, effort, and creativity, you can turn your ordinary leather gloves into extraordinary pieces of wearable art that are bound to catch everyone’s attention. Let your imagination run wild and watch as your gloves become a true reflection of your individuality and style.
Things You’ll Need
1. A leather deglazer or denatured alcohol
Before you begin the process of dyeing your leather gloves, it is crucial to prepare the surface meticulously. To achieve the best results, start by removing any existing finish from the gloves. This can be done effectively by using a deglazer or denatured alcohol. Simply apply the chosen solution onto a clean cloth and gently wipe it over the gloves. This step is essential as it helps to create an ideal surface for the dye to properly penetrate and adhere to the leather, ensuring a long-lasting and vibrant color. Taking the time to prepare the gloves in this way will ultimately contribute to a successful and satisfying dyeing experience.[2]
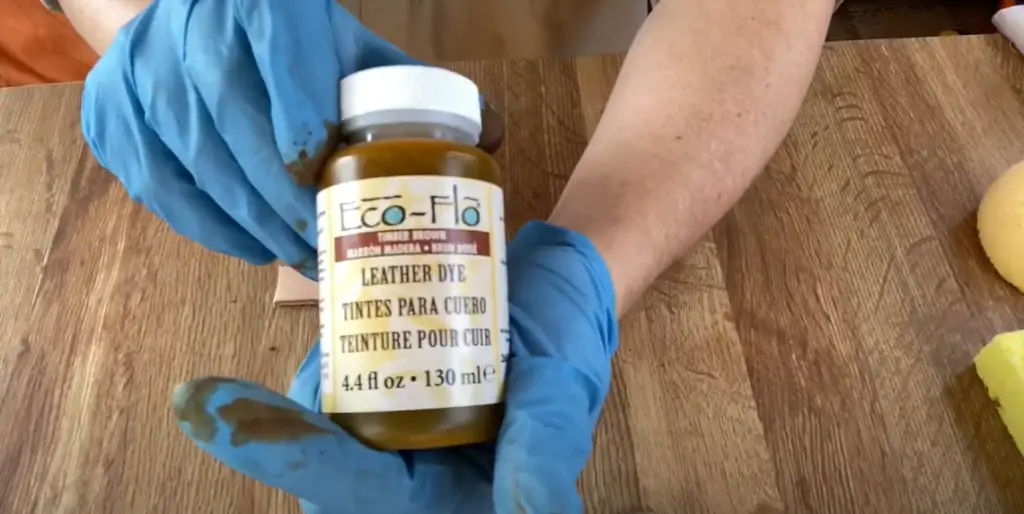
2. A leather dye or mink oil
Now that the gloves are ready, it’s time to carefully consider and choose the right medium for dyeing them. In the market, you can find several products that are specifically designed for dyeing leather, such as leather dyes, mink oils, and more. Each of these options offers a unique look and result when applied to the gloves, so it’s important to thoroughly read the product labels and instructions before making your selection. Keep in mind that the instructions may vary depending on the type of dye you decide to use. Taking the time to understand and choose the appropriate dye will ensure the best outcome for your gloves. So, explore the options, compare the possibilities, and make an informed decision to achieve the desired look and effect for your gloves.[2]
3. A leather conditioner
Once you’ve applied the dye to your gloves and achieved the desired color, it is important to follow up with a high-quality leather conditioner. This crucial step will not only protect and preserve the vibrant hue but also ensure that the gloves remain supple and free from the effects of drying out or cracking over time.
To properly condition your gloves, begin by selecting a clean cloth and generously applying the conditioner. With gentle circular motions, massage the conditioner into the leather, allowing it to be fully absorbed. This thorough conditioning process will help maintain the gloves’ softness and comfort for many years to come, ensuring that they continue to look as good as they feel.
By taking the time to apply a leather conditioner after dyeing your gloves, you are investing in their long-term durability and appearance. So, go ahead and give your gloves the extra care they deserve to keep them looking fabulous and feeling luxurious every time you wear them.[2]
4. A paint applicator brush
Finally, if you want to add some extra flair and creativity to your leather gloves, a paint applicator brush is the perfect tool for creating unique patterns and designs. You can choose from an array of colors and use the brush to paint intricate shapes, lines or swirls onto your gloves. This is a great way to truly make them stand out and will ensure that your gloves have a truly individual look and feel.[2]
So, if you’re ready to take your leather accessory game to the next level, then it’s time to grab some dye, conditioner and paint applicator brushes and get creative!

5. A mask and protective gloves
Safety should always be your top priority when dyeing leather gloves. To ensure your well-being, it is important to wear a face mask that covers your nose and mouth, along with protective gloves that shield your hands from any potential hazards. By taking these precautions, you can safeguard yourself from any harmful substances and prevent the dye from coming into contact with your skin.
Now that you have gathered all the necessary materials and tools for the project, it’s time to unleash your creativity and embark on the dyeing process. Follow the instructions provided on the packaging meticulously, paying attention to every detail. Don’t be afraid to explore different colors, techniques, and designs to achieve the desired outcome. Embrace the opportunity to experiment and let your artistic side shine through in this exciting endeavor. Happy dyeing![2]
Steps to Dye Leather Gloves
Step 1: Prepare the gloves
Before you begin the dyeing process, it is crucial to properly prepare your gloves. Start by removing any existing finish from the surface using a deglazer or denatured alcohol and a clean cloth. This step is essential as it helps create an optimal surface for the dye to adhere to, resulting in better color retention and a longer-lasting vibrant appearance. By taking the time to prepare your gloves before dyeing, you can ensure a more successful and satisfying outcome.[1]
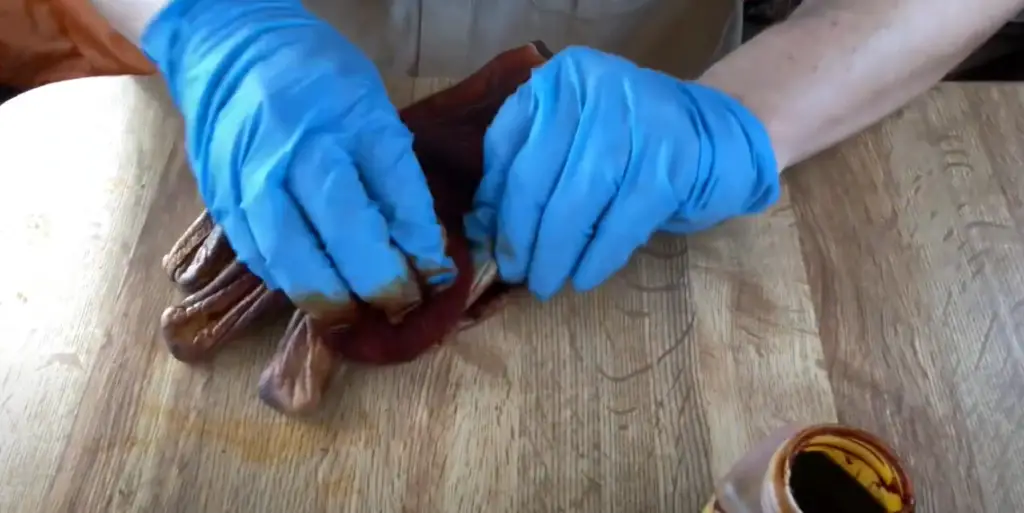
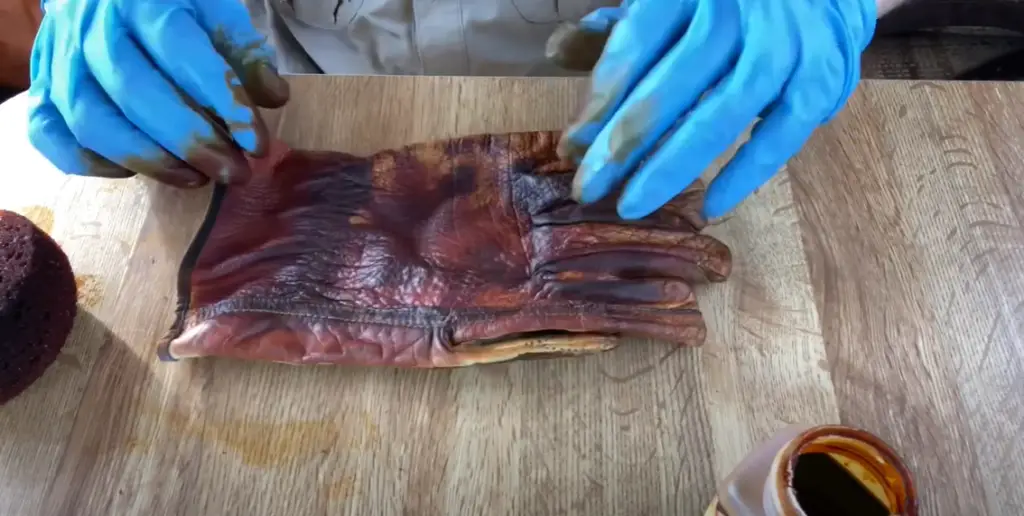
Step 2: Dye the gloves
Once the gloves are prepared and all set, it’s time to apply the dye. It’s important to select a product that is specifically formulated for leather and carefully read through the instructions before getting started. To achieve optimal results, take a paint brush or sponge and evenly distribute the dye across the entire surface of the gloves, ensuring there are no patches or streaks left behind. After applying the dye, it is crucial to allow ample time for it to thoroughly dry before proceeding to the next step in the process. Taking these extra steps will help ensure a successful outcome for your glove dyeing project.[1]
Step 3: Apply leather conditioner
Once the gloves have been thoroughly dried, it’s time to take the next crucial step in their maintenance routine: applying a high-quality leather conditioner. This vital process not only helps safeguard and preserve the color of the gloves but also prevents them from succumbing to the detrimental effects of drying out or developing unsightly cracks over time. To execute this step effectively, begin by procuring a clean cloth and generously massaging the leather conditioner onto the surface of both gloves, ensuring complete absorption. Remember, it’s crucial to invest in a premium leather conditioner specifically formulated for this purpose to achieve optimal results and extend the longevity of your beloved gloves.[1]

Step 4: Add extra flair (optional)
If you’re looking to elevate your glove dyeing experience to the next level, why not explore the realm of limitless possibilities and infuse your project with an extra dose of flair and creativity? Imagine the artistic potential that lies within the humble paint applicator brushes, waiting to be unleashed upon the supple leather canvas. With these versatile tools, you can effortlessly craft intricate patterns, captivating shapes, and mesmerizing lines, transforming your ordinary gloves into extraordinary works of art that embody and showcase your unique individual style. Let your imagination run wild as you delve into a kaleidoscope of hues, exploring a vast palette of colors to create a design that transcends the boundaries of ordinary craftsmanship. Embrace the boundless opportunities for self-expression and make a statement with gloves that truly reflect your artistic vision and personal flair.[1]
6 Proven Steps to restore leather gloves
Cleaning Conditioning: Soap Water
One of the most effective ways to restore leather gloves is by using a gentle soap and water solution. To begin, mix 1 teaspoon of mild liquid dish soap into 2 cups of warm water. Soak a clean cloth in this mixture and wring out any excess fluid before wiping your gloves down. Gently scrub off any dirt or debris that has accumulated on the leather and rinse with a damp cloth afterward. Once the gloves are completely dry, apply a generous amount of quality leather conditioner to nourish and protect them. Leave this on for several hours before wiping off any excess product with a clean cloth.[3]
Mending Repairing: Needle Thread
If your beloved leather gloves have begun to show signs of wear and tear, fret not! You can easily mend and repair them with just a needle and thread. Start by carefully examining the gloves and identifying any areas that require patching up or reinforcement. With a curved needle, elegantly weave through the worn-out holes, using a matching color of waxed linen thread. Ensure that each stitch is meticulously woven together, creating a strong and durable bond that will withstand the test of time. Don’t forget to diligently continue stitching and patching any other areas that require reinforcing. Once you have completed the restoration process, treat your gloves with a high-quality leather conditioner to keep them supple and in impeccable condition for years to come. Remember, by giving your gloves the TLC they deserve, you are preserving not only their functionality but also their timeless beauty.[3]
Refreshing Color: Dyes Oils
If the color of your leather gloves has begun to fade, you can easily inject new life into them by using dyes and oils. Start by thoroughly cleaning your gloves with a mild liquid soap and warm water solution before evenly applying quality leather dye across the surface. Once this has been done, use a soft cloth to massage in a few drops of natural mink oil or neatsfoot oil into the surface. This will help to bring out the color of the dye and also rejuvenate the leather, making your gloves look good as new![3]
Gluing Tears: Adhesives Glue
If your leather gloves have developed any small tears or holes, you can easily fix them using adhesives and glue. Start by cleaning the area with a damp cloth before applying a thin layer of quality leather adhesive across the tear. Once this is dry, reinforce the repair with a few layers of high-strength glue to ensure it stays in place for many years to come. Once the glue has hardened, you can gently sand down any excess material before applying a leather conditioner to finish off the repair job.[3]
Polishing: Waxes Creams
Another great way to restore leather gloves is by polishing them. Start by selecting a quality leather wax or cream and apply a thin layer of the product across the surface of your gloves. Use a soft cloth to gently massage it into the leather, making sure it’s even distributed throughout. This will help bring out its natural color and protect it from any further damage. Once the gloves are dry, buff them with a clean cloth to add shine and give them that freshly polished look.[3]
Finishing Touches: Buffers Polishers
Finally, to give your leather gloves that extra special shine and sheen, you can use buffers and polishers. Start by using a soft cloth to buff the surface of the gloves before applying a thin layer of quality wax or cream across the entire surface. Use an electric buffer or polisher to massage it into the leather evenly before leaving it on to dry. Once the product has been completely absorbed, you can give your gloves that extra special shine and sheen by buffing them with a clean cloth. This will help bring out their natural color and luster as well as protect them from any further damage. With these simple steps, you can easily restore your leather gloves so they look good as new![3]
FAQ
How can I change the color of my leather gloves?
You can easily change the color of your leather gloves by using leather dyes and oils. Start by thoroughly cleaning your gloves with a mild liquid soap and warm water solution before evenly applying quality leather dye across the surface. Once this has been done, use a soft cloth to massage in a few drops of natural mink oil or neatsfoot oil into the surface. This will help to bring out the color of the dye and also rejuvenate the leather, making your gloves look good as new!
What kind of dye do you use to dye leather?
The best type of dye to use for leather is a quality aniline dye. Aniline dyes penetrate deeper into the leather and create a vibrant, long-lasting finish that won’t easily fade or crack over time. It also helps protect the material from any further damage and should be used in combination with a quality leather conditioner for optimal results.
Can you dye glove-tanned leather?
Yes, you can dye glove-tanned leather. Glove-tanned leather is a special type of leather that’s often used to make gloves because it’s incredibly soft and durable. You’ll want to use a quality aniline dye when working with this material as it will penetrate deeper into the fibers and provide a more vibrant finish. Be sure to condition the leather with a quality conditioner afterward to help protect it from any further damage.
Can leather be dyed any color?
Yes, leather can be dyed any color but it is best to use aniline dyes for the most vibrant finish. Aniline dyes are specially formulated for leather and come in a wide range of colors so you can easily achieve the exact shade you’re looking for. Be sure to condition your leather with a quality conditioner afterward to help protect it from any further damage.
How do you permanently dye leather?
The best way to permanently dye leather is by using an aniline dye. Aniline dyes are specially formulated for leather and penetrate deeper into the fibers for a more vibrant finish that won’t easily fade or crack over time. Once you’ve chosen your desired color, evenly apply it across the surface of the material before conditioning it with a quality conditioner. This will help protect the material from any further damage and ensure your dye job lasts for many years to come.
Is it better to dye or paint leather?
Dye is generally the better option when it comes to leather as paints tend to sit on top of the material instead of penetrating deep into its fibers. Dyes are specially formulated for leather and will provide a more vibrant, long-lasting finish that won’t easily fade or crack over time. Be sure to condition your leather with a quality conditioner afterward to help protect it from any further damage.
Useful Video: How to dye a Leather glove (short version)
Conclusion
Leather gloves are a great way to keep your hands warm and protected while also adding a stylish element to any outfit. With the right tools and techniques, you can easily restore them so they look good as new! Start by cleaning the surface of the gloves with a mild liquid soap and warm water solution before evenly applying quality leather dye across the surface. Once this is done, use adhesives and glue to fix any small tears or holes before applying waxes and creams to bring out their natural color. Finally, use buffers and polishers to give the gloves that extra special shine and sheen. By following these simple steps, you can easily restore your leather gloves so they look good as new!
References:
- https://www.leatherskill.com/how-to-dye-leather-gloves/
- https://constructioninformer.com/dye-leather-gloves/
- https://www.edcmag.com/how-to-dye-leather-gloves/