Burnishing leather edges is a meticulous process that yields sleek and professional-looking finishes for leather products. This technique involves skillfully applying pressure and friction to the edges of a carefully crafted piece of leather, resulting in a glossy and remarkably smooth appearance. By meticulously burnishing, you can achieve a refined look that showcases the utmost craftsmanship.
In this comprehensive article, we will delve into the fundamentals of burnishing leather edges. From selecting the appropriate tools and materials to mastering the techniques, we will equip you with the knowledge and skills needed to embark on your journey of producing exquisite, one-of-a-kind leather products. Let’s dive in and explore the artistry of burnishing!
What Leather And Products Are Best For Burnishing?
When it comes to burnishing leather, not all types of leather or products are ideal. To achieve the best possible results, it is recommended to choose a full-grain hide with minimal flaws and imperfections. Full-grain leather, known for its durability and natural beauty, is an excellent choice as it takes well to burnishing techniques. A popular option is vegetable-tanned cowhide, which not only provides exceptional results but also retains its natural look and feel.
It’s important to note that natural veg-tan leather has not undergone any surface coating treatment, allowing for the finest burnishing results. The absence of surface coatings enhances the ability to achieve a smooth and polished finish, revealing the leather’s authentic character.
When engaging in burnishing, you have a wide range of leather products to choose from. Leather wallets, straps, and belts are all excellent options that can be transformed through burnishing. Each product offers its own unique challenges and opportunities for experimentation. For the most effective results, consider focusing on the thinnest edges, as they tend to showcase the burnishing effects more prominently.[2]
By paying attention to these details and selecting the right leather and product, you can ensure a rewarding burnishing experience, elevating the aesthetic appeal of your leather goods to new heights.
Can You Burnish Chrome Tanned Leather?
Chrome-tanned leather is widely favored in the production of leather goods because of its exceptional durability and relatively affordable price. However, it is important to note that due to its inherent rigidity and absence of natural oils, this type of leather is not well-suited for burnishing techniques. The lack of pliability and necessary oils hinders the achievement of smooth and polished results. Therefore, it is highly recommended to steer clear of using chrome-tanned leather for any burnishing projects you may undertake.[2]
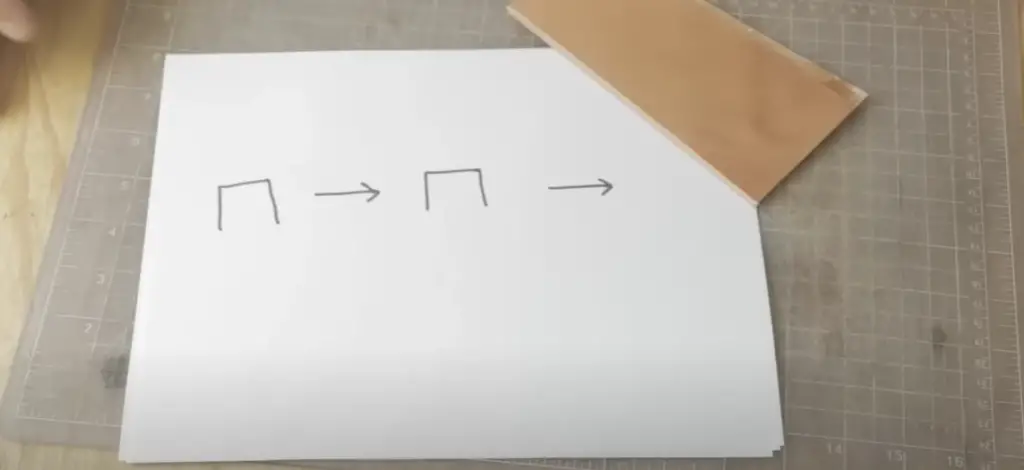
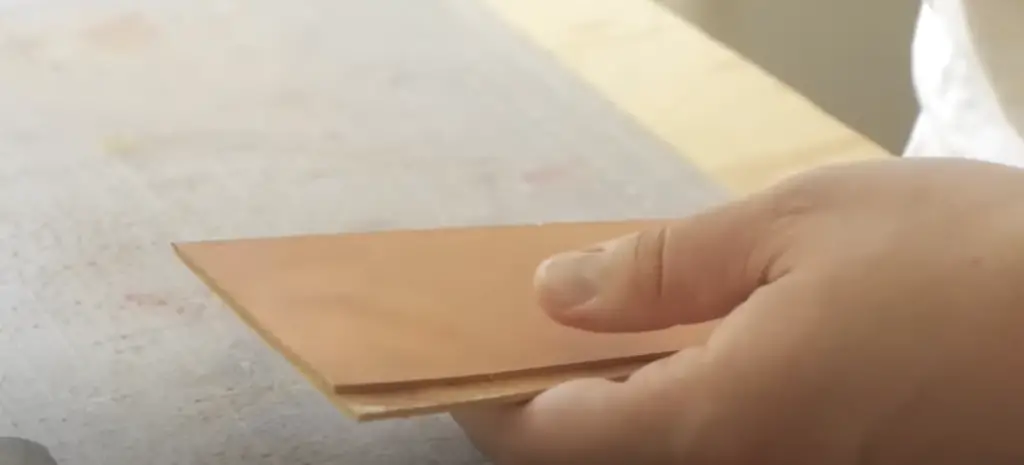
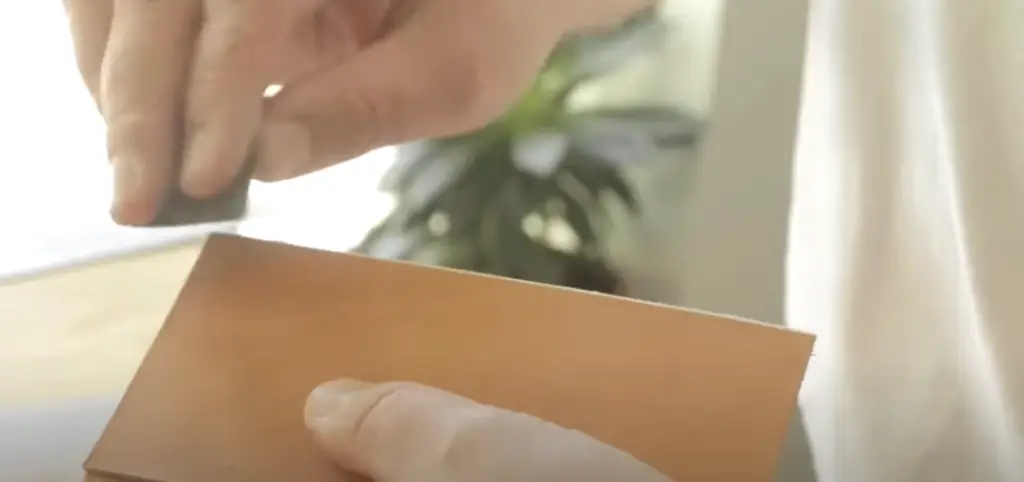
Step 1: Cut Correctly
As with any endeavor, the foundation of success relies on the preparations you make before starting. When burnishing leather edges, this involves cutting the material to size and prepping its surface for burnishing.
Using a pair of sharp scissors or an X-Acto knife, carefully trim off any excess materials from your leather piece. Though it might be tempting to significantly reduce the material, resist the urge and take your time to ensure you don’t cut off too much. Cutting too short will make it difficult for more intricate designs or patterns to be burnished properly.
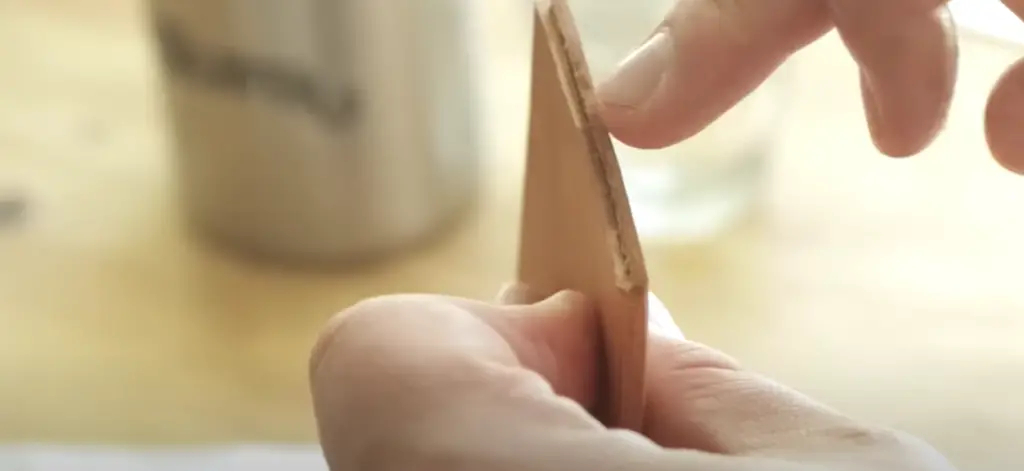
Once you finish trimming the material, use sandpaper to refine any rough edges and smooth out any lumps or bumps that may interfere with the quality of your burnishing. Pay close attention to the thinnest edges as these will be most exposed and visible after the burnishing process is complete.[2]
Step 2: Glue the Edges
Once you have finished cutting and sanding your leather piece, it’s time to move on to the crucial step of gluing the edges. This step becomes particularly important as it serves the purpose of preventing the leather from fraying while burnishing, ensuring a clean and polished finish.
To begin, it is recommended to use a high-quality hide glue for optimal results. Take care to evenly distribute a thin layer of adhesive along all four sides of your piece, paying special attention to the thinnest edges where fraying is more likely to occur. By giving attention to these delicate areas, you are ensuring the longevity and durability of your leather project.
After applying the glue, it is advisable to use a slightly damp cloth to gently rub away any excess adhesive that may be visible. This step not only helps to create a neater appearance but also aids in achieving a smoother surface for subsequent finishing techniques.
Taking the time to follow these detailed steps in gluing the edges of your leather piece will result in a superior finish and contribute to the overall quality and longevity of your leatherwork.[3]
Step 3: Cut Again
Once the glue has had ample time to set and dry, it’s time to cut the leather again. This step involves trimming away any excess material that is left over from the gluing process. Using a sharp pair of scissors or an X-Acto knife, carefully clip off any excess adhesive from around the edges of your piece.
It is important to be precise with your cuts, as any mistakes may appear more noticeable after the burnishing process. Take your time and carefully trim away any excess materials until you have achieved a desired shape or design.
At this stage, it is also important to refine the edges of your leather piece using sandpaper. This step aids in creating an even surface that can take well to the burnishing techniques that will be utilized later.[3]
Once you finish cutting and sanding your piece, it’s time to move on to the final step of burnishing leather edges – applying a coat of finishing wax.
Step 4: Bevel and Apply Finishing Wax
The final step for burnishing leather edges is to bevel the material and apply a coat of finishing wax.
Using a bone folder, carefully begin to press down on each edge of your piece, working from one corner to the other. As you press down, use small circular motions along all four sides of your piece to create a beveled effect.
Once you have achieved the desired shape, use a soft cloth to apply a thin layer of wax across all four sides of your leather piece. This will help to seal and protect the edges from any moisture or dirt, as well as keep them looking smooth and polished.[3]
After allowing the wax sufficient time to dry, your leather piece is ready to be enjoyed for years to come.
Step 5: Sand Like A Maniac
The final step in burning leather is to sand like a maniac. Using a fine-grit sandpaper, take the time to carefully remove any small bumps or imperfections that may be present on the edges of your leather piece. Take care to focus especially son the thinnest edges, as they tend to showcase these flaws more prominently.
It is important to be thorough with your sanding technique, as any bumps that remain may become more noticeable after the burnishing process is complete. By taking the time to ensure these areas are properly sanded, you can guarantee a smoother and neater finish for your leather project.[1]
Once all of the edges have been sanded to perfection, take a few moments to admire the result of your hard work and effort. There’s no better feeling than seeing a professional-level finish on leather projects that you have taken the time to create with your own hands.
Step 6: Dye the Leather
Now that your leather edges have been burnished to perfection, it’s time to move onto the final step of the process: dyeing the leather.
Using a soft cloth, apply a thin and even layer of dye across all four sides of your piece. Take care to pay special attention to any corners or angles that may be present on your project. It is important to evenly distribute the dye across all areas of your leather piece, including any thin edges that were burnished in the previous step.
Once you have finished applying a coat of dye to your leather piece, allow it ample time to dry before proceeding with any further steps. Depending on the type of dye used, this may require anywhere from several minutes to a few hours. By taking the time to ensure that your leather is completely dry, you can guarantee a professional-level finish that will last for years to come.[1]
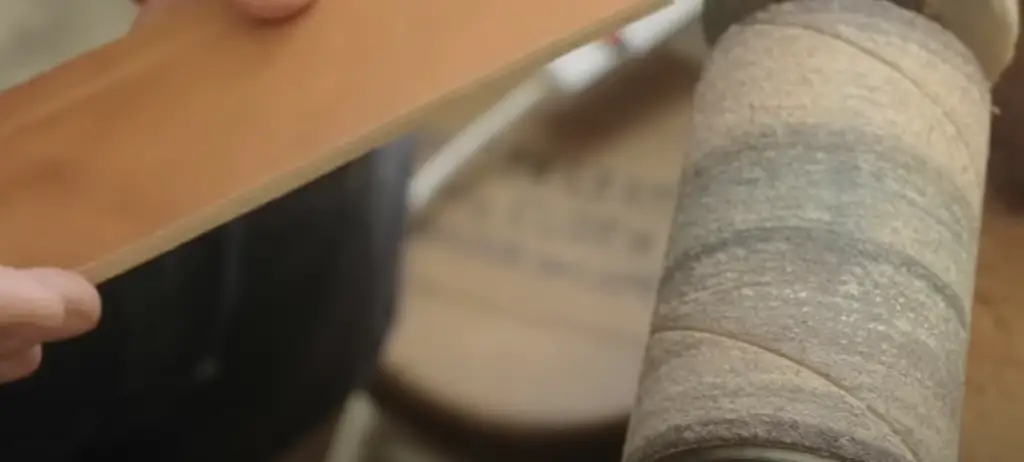
Step 7: Burnish With A Wood Slicker
The final step for burnishing leather edges is to use a wood slicker. This step involves running the slicker across all four sides of your piece, paying special attention to any corners or angles that may be present. As you run the tool along each side, it will separate and refine the fibers in the leather, creating a smooth finish with sharp edges.
Using a wood slicker to burnish leather edges is an essential step for achieving a professional-level finish. This technique not only helps to smooth out any bumps or imperfections but also adds the perfect amount of shine and polish to your project.
The end result will be a striking leather piece that you can be proud of for years to come. With proper care and maintenance, this piece will stand the test of time and remain looking as polished and professional as the day you created it.[1]
Step 8: Apply Beeswax to Protect the Leather
The last step for burning leather edges is to apply beeswax. This will help provide your project with an extra layer of protection and can also give it a subtle sheen.
Once the beeswax has had ample time to set and dry, your leather piece is ready for use. With a few simple steps, you can ensure that it will last for many years to come. Enjoy your newly burnished leather edge![1]
How To Burnish Leather Without Tools
Brush the Edges With an Abrasive Material
Burnishing leather edges without tools is an easy process that can be done with just a few common items.
The first step for burnishing your leather edge without tools is to brush the edges using an abrasive material. This can be anything from sandpaper, steel wool, or even a small piece of old denim cloth. Anything that has enough texture to polish the leather without damaging it is suitable for this step.
Once you have chosen your abrasive material, simply begin to rub it across the edges of your piece in a circular motion. This will help to create a smooth and polished finish that will look much better than regular sanding results.[5]
Apply a Compound On the Leather Edges
The next step for burnishing leather without tools is to apply a compound on the edges. This can be anything from shoe polish, beeswax, or even oil-based balm. Anything that will help to seal and protect the edges of your project is suitable for this step.
Using a cloth or a brush, carefully apply the chosen compound across all four sides of your leather piece. Be sure to evenly distribute the compound, paying special attention to any thin edges or corners that may be present on your project.
By taking the time to ensure that all areas have been covered with a protective layer, you can guarantee a polished and professional-level finish for years to come.[5]
Rub Edges With a Hard Material or Object
The final step in burnishing leather edges without tools is to rub the edges with a hard material or object. This can be anything from a piece of metal, wood, or even an old credit card. The goal here is to use something that won’t damage your project but will have enough texture and weight to help refine and polish the leather fibers.
Using a circular motion, begin to rub the chosen material or object across all four sides of your project. Focus especially on any angles and corners that may be present. This will help to refine the leather fibers and create a smooth finish with sharp edges.[5]
Let Your Leather Dry
Once you have finished burnishing your leather edges, it is important to let the piece dry before using or wearing it. Depending on the type of dye or compound used, this may require anywhere from several minutes to a few hours.[5]
FAQ
What can be used to burnish leather?
Burnishing leather is a process that can be done using either tools such as a burnisher or a wood slicker, or without tools by simply brushing an abrasive material across the edges of the leather and sealing it with a protective compound.
How long should I burnish the leather edges by hand?
This will depend on the type of leather and the type of abrasive material used. Generally, you should aim to rub the material across the edges for at least a few minutes in order to ensure that they have been properly burnished.
How do you burnish thin leather edges?
Burnishing thin leather edges is a delicate process that requires extra attention to ensure that they are not damaged. The best way to do this is to use a wood slicker instead of an abrasive material in order to gently refine and polish the fibers without causing any damage.
Can you burnish leather with olive oil?
While olive oil can be used to condition leather, it is not suitable for burnishing. This is because olive oil does not have the same protective properties that other compounds such as beeswax or shoe polish do. Therefore, it would not provide the necessary protection to help preserve the life of your leather piece over time.
Can you use beeswax to burnish leather?
Yes, beeswax is an excellent choice for burnishing leather edges. Not only does it help to seal and protect the leather but it also adds a subtle sheen to the piece. Be sure to use a soft cloth to evenly distribute the wax across all four sides of your project. This will ensure that all areas have been properly coated with a protective layer.
What is a substitute for gum tragacanth?
Gum tragacanth is a type of sap that has been used for centuries to burnish leather. Unfortunately, it can be difficult to find in some areas. If you cannot find this product, other common substitutes include beeswax or mink oil. All of these products will help provide your leather piece with a polished edge and protect it from wear over time.
What is an alternative to Tokonole?
Tokonole is a type of wax that has been used for centuries to burnish leather. If you cannot find this product, other common alternatives include beeswax or mink oil. All of these products will help provide your leather piece with a polished edge and protect it from spills and wear over time.
Is olive oil and beeswax good for leather?
Yes, olive oil and beeswax are both great for conditioning and protecting leather. When used together, they can help to seal the leather, while also creating a subtle sheen. Be sure to evenly distribute both products across all four sides of your project with a cloth or brush in order to ensure that all areas have been covered.
Does beeswax make leather shiny?
Yes, beeswax can help to create a subtle sheen on leather. Be sure to evenly distribute the wax across all four sides of your project with a cloth or brush in order to ensure that all areas have been covered. This will not only help to seal the leather but also add a polished and professional-level finish.
Does beeswax dry out leather?
No, beeswax will not dry out leather. In fact, it helps to seal the leather and protect it from spills and wear over time. Be sure to evenly distribute the wax across all four sides of your project with a cloth or brush in order to ensure that all areas have been covered.
Useful Video: How to Burnish Leather Edges
Conclusion
Burnishing leather edges is a simple process that can help to create a polished and professional-level finish on any leather project. Whether you choose to use tools or do it by hand, the main steps remain the same: rub an abrasive material across all four sides of your piece, apply a protective compound such as beeswax or shoe polish, and let the piece dry.
By taking the time to ensure that all areas have been properly burnished, you can guarantee a long-lasting finish for years to come. If done correctly, your leather piece will have sharp edges and a subtle sheen that is sure to impress. So take the time to carefully burnish your leather today!
References:
- https://www.goldbarkleather.com/sourceblog/2015/12/29/a-basic-guide-to-burnishing
- https://www.sailrite.com/how-to-slick-leather-edges
- https://www.leatherskill.com/how-to-burnish-leather-without-tools/
- https://borderlandleather.com/how-to-burnish-leather-edges/
- https://www.buckleguy.com/buckleguy-blog/why-how-burnish-leather