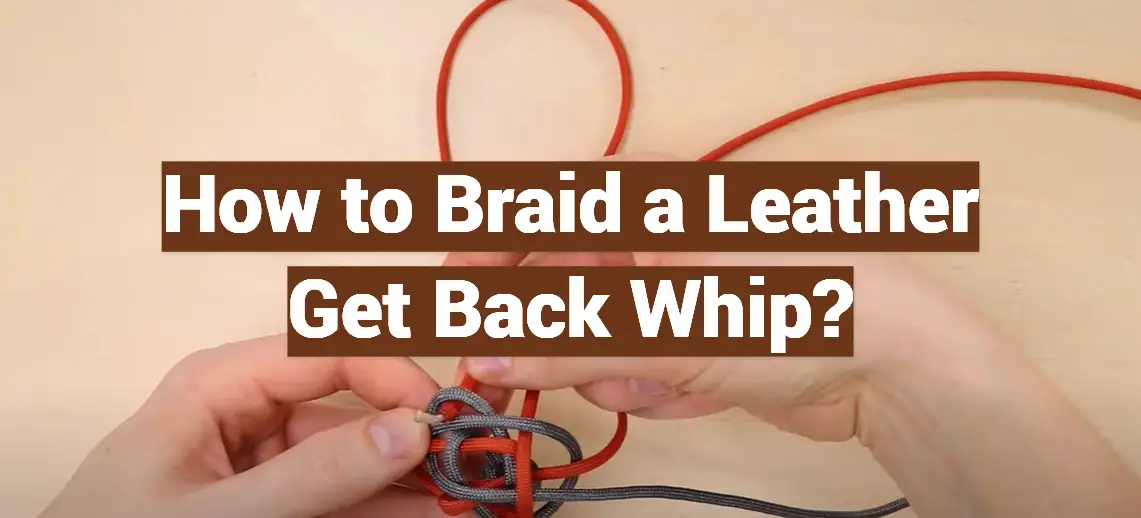
Leather Get Back Whips are not just a stylish accessory for bikers; they are a symbol of the freedom and spirit associated with the culture. Braiding one yourself can be a rewarding endeavor, adding a personal touch to your ride. This comprehensive guide will walk you through each step of braiding a Leather Get Back Whip, empowering you to showcase your craftsmanship and unique style.
Brief History of Leather Get Back Whips
Leather Get Back Whips have a long and fascinating history, with origins dating back to the early 19th century. They were first used by bikers as an alternative to traditional whips, which were often made of horsehair or other materials that could easily break or become tangled while riding.
In addition to their practical use for whipping horses and other animals while riding, Leather Get Back Whips also became a fashion statement for bikers. They were often adorned with intricate braids, beads, and other decorative elements to reflect the biker’s personal style.
However, with advancements in motorcycle technology and changes in biker culture, the use of Leather Get Back Whips declined over the years. But they have recently seen a resurgence in popularity among vintage motorcycle enthusiasts and those looking for a unique accessory to add to their riding gear. [1]
How to Braid a Leather Get Back Whip?
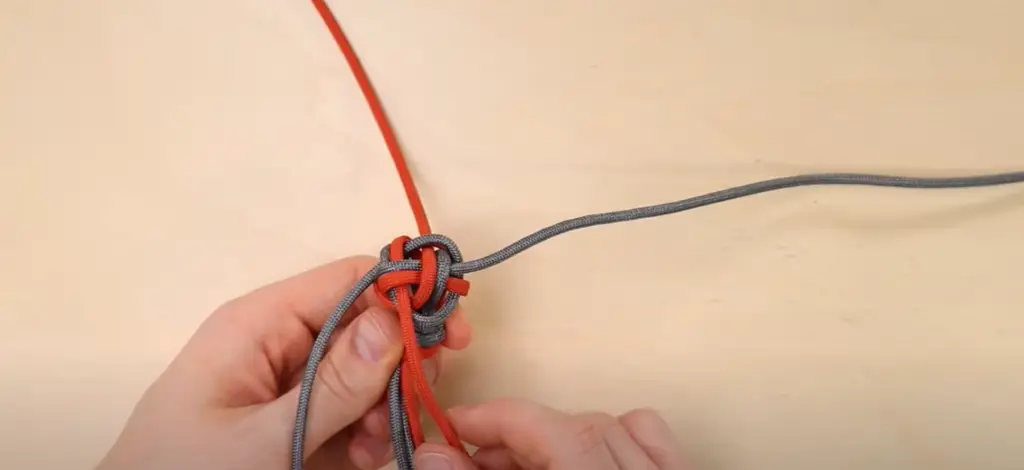
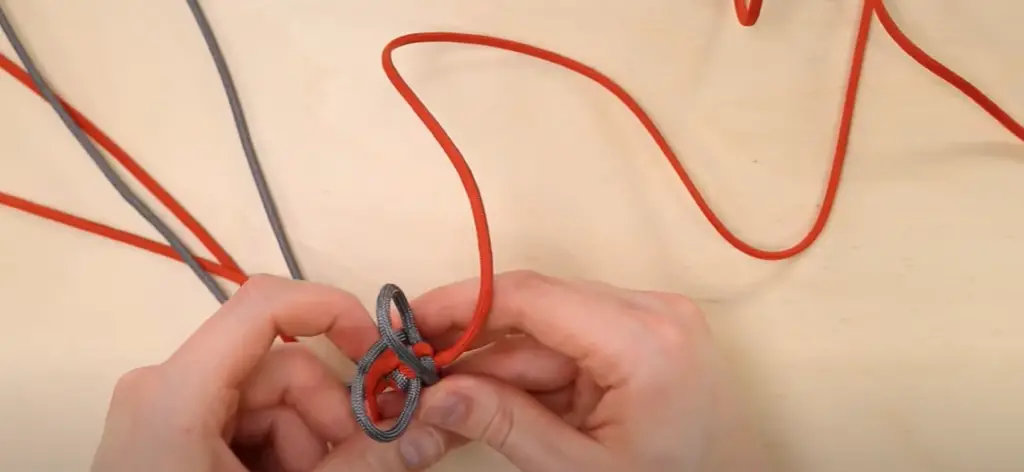
Crafting a Leather Get Back Whip through intricate braiding demands a combination of patience, precision, and a foundational understanding of braiding techniques. Here are the steps for creating a classic three-strand braid on a Leather Get Back Whip:
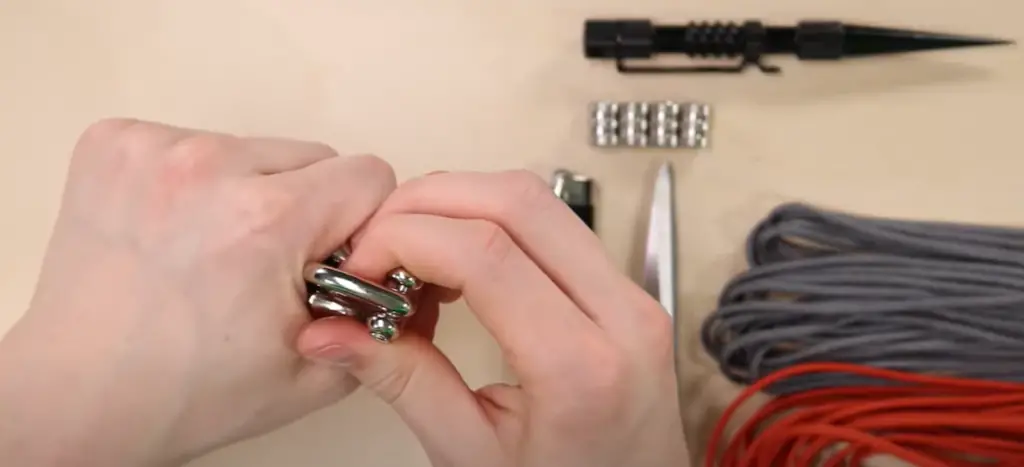
- Gather your materials: You will need a length of leather cord (preferably in a color that complements your whip), a sharp knife or scissors, and a work surface.
- Prepare the leather cord: Cut three equal lengths of leather cord, each measuring approximately 3-4 feet long. If you prefer a thicker braid, you can also use thicker cords.
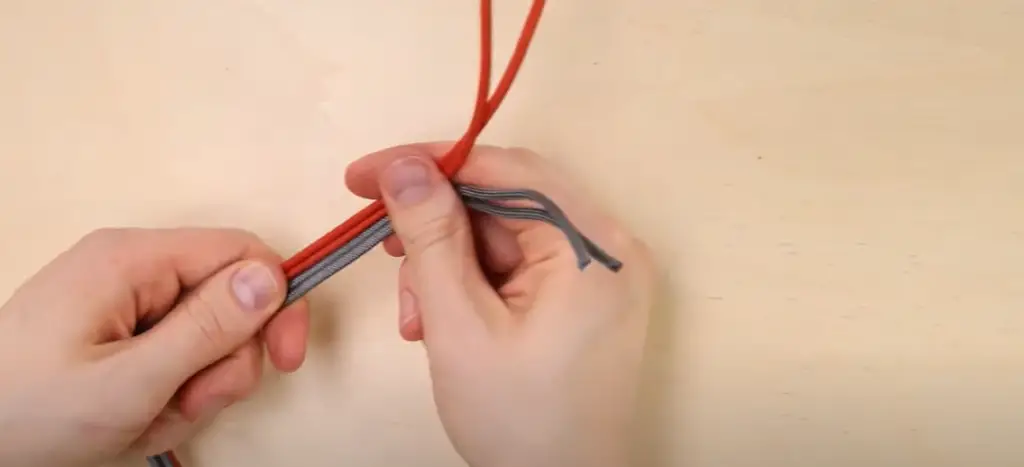
- Secure the cords: Tie one end of the three cords together in a knot, leaving about an inch of excess cord at the bottom.
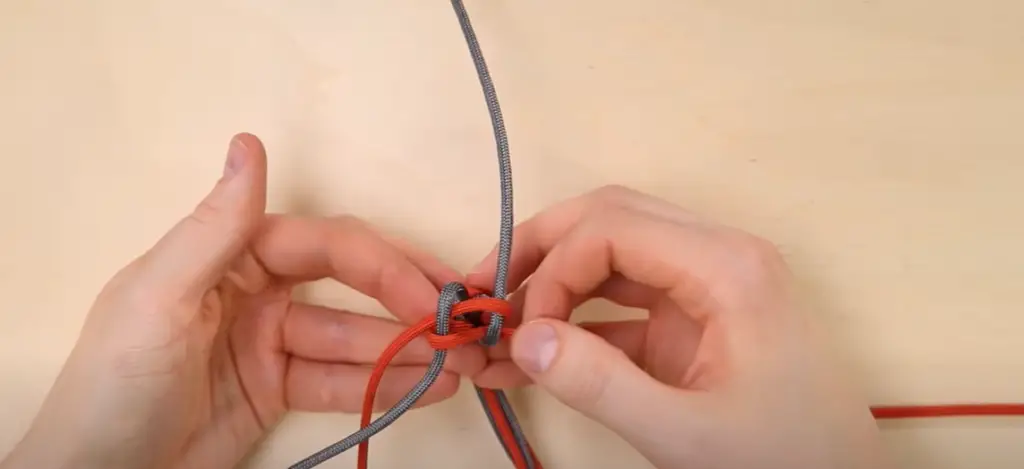
- Start braiding: Separate the three cords and hold them between your fingers, with one in each hand and the third in your dominant hand. Cross the left-hand cord over the center cord, then cross the right-hand cord over the new center cord.
- Repeat: Continue this crisscrossing motion, always crossing the outer cords over the center cord until you reach the desired length of your braid.
- Tie off the end: Once you have reached your desired length, tie off the three cords together in a knot at the bottom.
- Trim and finish: Use scissors or a knife to trim any excess cord from both ends of your braid and smooth out any uneven sections. You can also add decorative elements such as beads or charms to the bottom knot for a personalized touch.
With practice, you can experiment with different braiding techniques and create unique designs on your Leather Get Back Whip. Just remember to take your time and enjoy the process – after all, it’s not just about creating a functional whip, but also expressing your personal style as a biker. [2]
Types of Leather Used for Braiding a Get Back Whip
The type of leather used for a Get Back Whip can greatly impact the overall look and feel of the final product. Some common types of leather used for braiding include:
- Vegetable-tanned leather: This is the traditional material used for making Leather Get Back Whips, as it is durable and easy to work with.
- Suede: Suede leather adds a softer and more textured look to the braid, making it a popular choice for those looking for a unique design.
- Exotic leather: For a more luxurious touch, exotic leathers such as alligator or ostrich can be used for braiding. However, these types of leather may be more difficult to work with and require special tools.
When selecting leather, regardless of the type, it is crucial to choose a high-quality and flexible material that can withstand the regular wear and tear of use.
Tips and Tricks for a Perfectly Braided Whip
- Practice makes perfect: Braiding a Leather Get Back Whip can be challenging at first, so don’t get discouraged if your first few attempts don’t turn out exactly how you want them to. Keep practicing and experimenting with different techniques until you find what works for you.
- Use proper tools: It’s important to use sharp scissors or a knife when cutting the leather cords to ensure clean and precise cuts. You may also want to invest in a leather cutting mat or other tools designed for working with leather.
- Keep the braid tight: For a beautifully crafted and uniform braid, it is crucial to maintain consistent tension on each cord throughout the braiding process. This will effectively prevent any loose or uneven sections from forming.
- Experiment with different designs: Don’t be afraid to try out different braiding techniques and add in decorative elements such as beads or charms to create a unique design.
- Take your time: Braiding a Leather Get Back Whip is not something that can be rushed. Set aside enough time and work slowly to ensure the best results.
By following these tips and tricks, you’ll be able to create a beautifully braided Leather Get Back Whip that will not only add a personal touch to your riding gear but also stand the test of time. So, grab some leather and get braiding! [3]
Care and Maintenance of a Leather Get Back Whip
To ensure the longevity of your Leather Get Back Whip, it’s important to properly care for and maintain it. Here are some tips to keep in mind:
- Keep it clean: Wipe down your whip with a soft cloth after each use to remove any dirt or debris. You can also use a mild leather cleaner if needed.
- Avoid exposure to water: Leather is not waterproof, so it’s best to keep your whip away from water to prevent any damage or discoloration.
- Condition the leather: Use a leather conditioner every few months to keep the leather soft and supple. This will also prevent the braid from becoming stiff or brittle over time.
- Store properly: When not in use, store your Leather Get Back Whip in a cool, dry place away from direct sunlight. This will help prevent any fading or damage to the leather.
What’s The Point Of Get Back Whips?
Get back whips are a popular accessory for motorcycles and have been popularized by the biker culture. They serve both functional and aesthetic purposes, making them a staple for many riders.
But get back whips are not just functional, they also add a unique touch to a motorcycle’s appearance. They come in various materials such as leather, nylon, and paracord, and can be customized with different colors and designs. Many riders see them as a way to express their individuality and personalize their bikes. [4]
How Long Do Leather Whips Last?
Leather whips have been used for centuries as a tool for tasks such as taming horses, hunting, and self-defense. And while leather is known to be a strong and durable material, it’s important to know how long your leather whip will last.
The lifespan of a leather whip depends on various factors such as its construction, frequency of use, maintenance, and storage. A well-made and properly cared for leather whip can last for many years, while a poorly made or neglected whip may only last for a few months.
Construction
The construction of a leather whip plays a crucial role in its durability. The quality of the leather used, the braiding technique, and the materials used for the handle can all affect how long your whip will last.
Higher quality leather, such as full-grain or top-grain, will generally last longer than lower quality leather. This is because these types of leather are thicker, denser, and more resistant to wear and tear. In terms of braiding technique, a whip with tighter braids will be stronger and more durable compared to one with looser braids. The materials used for the handle, such as wood or metal, can also impact the longevity of a whip.
Frequency of Use
The more frequently a leather whip is used, the faster it will wear out. This is especially true for whips that are used for tasks such as taming horses or cracking during cattle herding. These activities put a lot of stress on the whip, causing it to wear out faster. On the other hand, if a leather whip is only used occasionally for recreational purposes, it will last much longer.
Maintenance and Storage
Proper maintenance and storage are essential in prolonging the lifespan of your leather whip. After each use, it’s important to clean and condition the leather to prevent it from drying out or developing cracks. It’s also important to store the whip in a cool and dry place, away from direct sunlight or extreme temperatures. This will help prevent the leather from becoming brittle or discolored. [5]
How Do You Crack A Leather Whip?
Cracking a leather whip is a skill that takes practice and patience to master. The technique involves creating a loud cracking sound by quickly flicking the whip in a specific manner. Here are some steps on how to crack a leather whip:
- Hold the Whip Properly – Grip the end of the handle with your dominant hand, leaving about 2-3 feet of the whip uncoiled. Hold the whip at a 45-degree angle with your arm extended parallel to the ground.
- Practice Swinging – Before attempting to crack the whip, practice swinging it back and forth in a controlled manner. This will help you get a feel for the weight and movement of the whip.
- Create a Loop – Once you’re comfortable with the swinging motion, try to create a small loop at the end of the whip by flicking your wrist upwards.
- Snap Your Wrist – As you create the loop, quickly snap your wrist downwards while simultaneously pulling back on the handle. This will cause the tip of the whip to crack and create a loud sound.
- Practice Makes Perfect – Cracking a leather whip takes practice and patience. Keep practicing until you can consistently create a loud cracking sound.
How Often Should You Oil Leather?
The frequency of oiling leather depends on the type of leather and its intended use. For example, leather used for furniture or footwear may require regular oiling to maintain its suppleness and prevent cracking. However, for leather whips, it’s recommended to only oil them when they start to show signs of dryness or cracking.
It’s important not to over-oil leather as this can cause it to become too soft and lose its strength. Generally, once every 6-12 months is a good guideline for oiling leather whips. However, if the whip is used frequently or exposed to harsh elements, it may need to be oiled more often.
Properly oiled leather will not only last longer but also look better and feel more comfortable to use. It’s important to use a high-quality leather oil or conditioner specifically designed for leather products. Avoid using household oils, such as cooking oil or motor oil, as they can damage the leather. [6]
FAQs
What is a Leather Get Back Whip?
A Leather Get Back Whip is a type of motorcycle accessory that can be attached to the end of a handlebar grip. It is typically made from braided leather and features metal studs or other decorations.

How do I braid a Leather Get Back Whip?
To braid a Leather Get Back Whip, you will need:
- A length of leather cord or rope
- Scissors
- A sturdy surface to work on
- Start by cutting your leather cord into three equal pieces.
- Tie a knot at one end of the cords, leaving a small loop at the top.
- Secure the loop to a sturdy surface with a clamp or heavy object.
- Begin braiding the three strands together, making sure to keep them taut.
- As you braid, periodically add in small metal studs or other decorations if desired.
- Continue braiding until you reach the end of the cords, then secure with another knot.
- Trim any excess cord and your Leather Get Back Whip is ready to be attached to your motorcycle!
Can I use different materials besides leather?
Yes, you can use different materials such as paracord or synthetic leather to braid a Get Back Whip. However, keep in mind that the durability and appearance may differ from traditional leather.
What are the benefits of using a Leather Get Back Whip?
Besides adding style to your motorcycle, Leather Get Back Whips serve as a functional accessory. They can be used as additional grip while riding and can be easily detached to use as a self-defense weapon if needed. They also serve as a reminder for other motorists to keep a safe distance from your motorcycle.
Are there any safety precautions I should take when using a Leather Get Back Whip?
It is important to remember that while Leather Get Back Whips can serve as a means of protection, they should not be used as a weapon unless absolutely necessary. Moreover, make sure to securely attach the whip to your motorcycle and be mindful of any laws or regulations regarding the use of such accessories in your area.
Why would someone want to braid a Leather Get Back Whip?
Braiding a Leather Get Back Whip adds a personal touch to your motorcycle and allows you to customize it according to your preferences. It also serves as a conversation starter among fellow riders and can be a fun DIY project for motorcycle enthusiasts. Additionally, having a Get Back Whip on your bike can enhance the overall look of your ride and make it stand out from others.
How long does it typically take to braid a Leather Get Back Whip?
The time it takes to braid a Leather Get Back Whip may vary depending on your level of experience and the complexity of the design. However, with practice, it can be completed in less than an hour.
Can I purchase pre-braided Leather Get Back Whips?
Yes, there are many online retailers and motorcycle accessory shops that offer pre-braided Leather Get Back Whips. However, keep in mind that making your own allows for more customization and can be a fun project to undertake.
What other motorcycle accessories can I make using braiding techniques?
There are many other motorcycle accessories that can be made using braiding techniques, such as handlebar tassels, keychains, or even saddlebags. The possibilities are endless and can add a unique touch to your motorcycle. So, why not give it a try?
Can beginners undertake braiding a Leather Get Back Whip, or is prior experience required?
Braiding a Leather Get Back Whip is a relatively simple and straightforward process, making it suitable for beginners. With patience and practice, anyone can learn how to braid their own get back whip. However, if you are uncomfortable with using sharp tools like scissors or have limited mobility in your hands, it may be best to seek assistance from someone with more experience.
What are the common mistakes to avoid while braiding a Leather Get Back Whip?
Some common mistakes to avoid while braiding a Leather Get Back Whip include:
- Not keeping the cords taut, resulting in a loose and messy braid
- Using uneven lengths of cord, causing one side of the whip to be longer than the other
- Adding too many decorations, making it difficult to handle or damaging the overall look
To ensure a smooth and successful braid, make sure to follow the instructions carefully and take your time.
How can I maintain my Leather Get Back Whip after braiding?
To keep your Leather Get Back Whip in good condition, it is recommended to periodically clean and condition the leather. You can use a leather cleaner and conditioner specifically designed for motorcycle accessories or simply wipe it down with a damp cloth and apply some leather conditioner. Additionally, make sure to check the attachment points regularly to ensure they are secure and replace any worn out parts if necessary.
Can I braid a Leather Get Back Whip in different patterns or designs?
Yes, you can experiment with different braiding patterns and designs to create unique and personalized Leather Get Back Whips. Some popular techniques include the classic three-strand braid, four-strand braid, and fishtail braid. You can also incorporate different colors of leather cord or add in beads and other decorations to create a one-of-a-kind design. Have fun and let your creativity run wild!
Useful Video: Make a “Getback” Whip from Paracord
Conclusion
In conclusion, braiding a leather get back whip may seem daunting at first, but with practice and dedication, anyone can master this skill. By following the steps outlined in this guide, you’ll be able to create your own custom get back whip that is not only functional but also visually appealing.
Remember, braiding a leather get back whip requires patience and precision. Take your time and don’t rush the process. The end result will be worth it.
Also, don’t be afraid to experiment with different braiding patterns, colors, and materials. This will allow you to create a unique get back whip that reflects your personal style.
References:
- https://diyquickly.com/how-to-make-a-leather-get-back-whip/
- https://leatherworker.net/forum/topic/57515-biker-get-back-whip-how-to-and-size-material/
- https://www.bikeweekleathers.com/how-to-make-a-leather-biker-get-back-whip/
- https://www.ironbraid.com/motorcycle-accessories/get-back-whips/
- https://www.easternperformance.com/iron-braid-36-leather-old-school-black-orange-get-back-whip-for-motorcycle.html
- https://www.motorcyclelegalfoundation.com/are-get-back-whips-legal-everything-you-should-know/