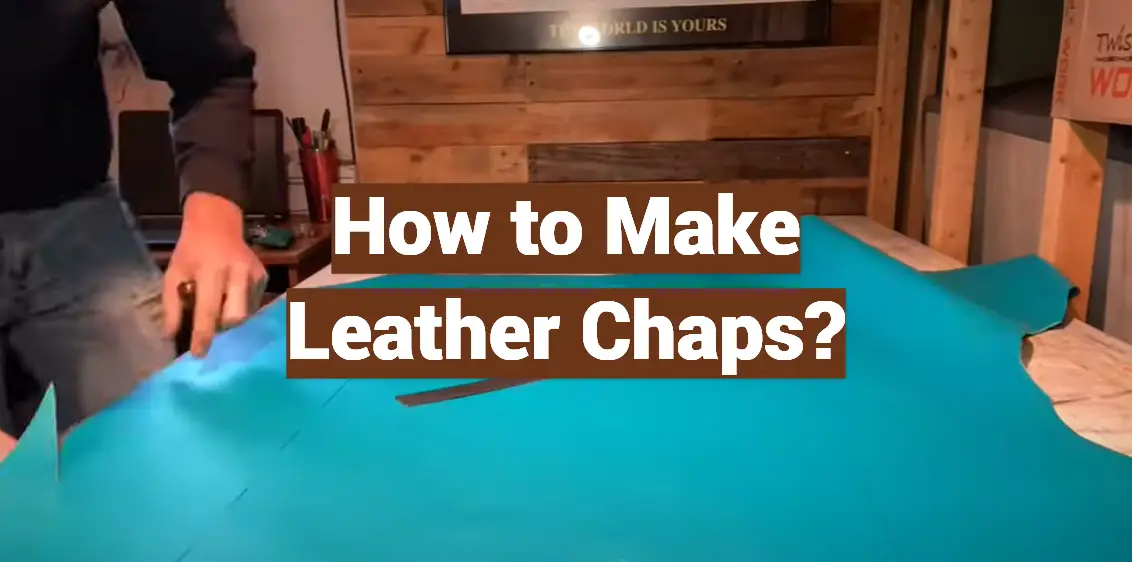
Leather chaps are an essential piece of attire for those who spend a lot of time on horseback, offering protection and durability. Often associated with the rugged charm of cowboys, they also make a bold fashion statement. This guide will take you through the process of creating your own pair of leather chaps, providing step-by-step instructions to ensure a perfect fit and high-quality finish. With patience, the right tools, and a bit of elbow grease, you’ll be able to craft a pair of chaps that are both practical and stylish.
What are Chaps?
Chaps, also known as chaparejos or leggings, are protective garments typically used by equestrians and other outdoor workers. They are designed to protect the legs from abrasions, scrapes, and scratches while riding horses or performing other duties outdoors.
Materials and Tools
Leather chaps are made with thick, durable leather such as cowhide or buffalo hide. You will also need some basic tools for cutting and punching the leather: scissors, an awl (pointed tool), a hammer, and a heavy-duty needle and thread. If you plan to dye the leather, you will also need a suitable dye.
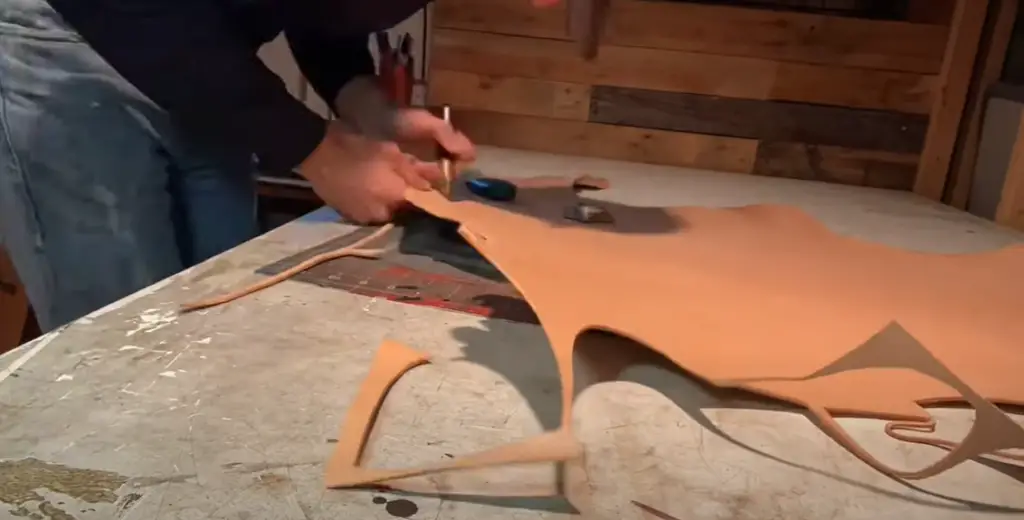
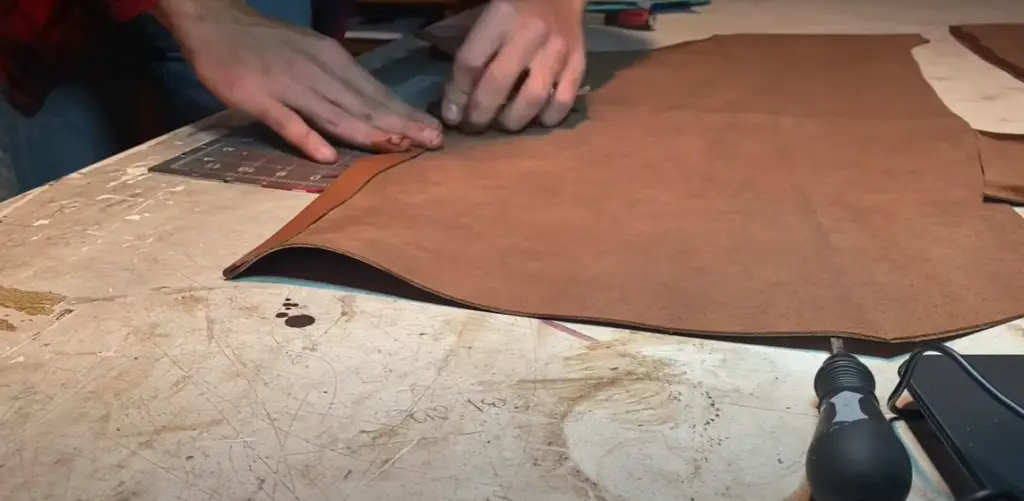
Step 1: Measure and Cut the Leather
Using a measuring tape, measure your body from waist to ankle and add 5 inches for extra length. This will be the length of your leather chaps. Mark this measurement on the leather with an awl or marker. Use scissors to cut out the pieces for the chaps. Make sure that you have two identical pieces.
Step 2: Punch and Sew the Leather
Punch holes along one side of both leather pieces with an awl or punch tool. Place the two pieces together, matching up the punched holes. Thread a heavy-duty needle and sew along the edges, making sure to go through each hole as you go. Take your time while sewing to ensure even stitches. [1]
Step 3: Add the Leg Straps
Cut two pieces of leather for leg straps and punch holes in each end. Sew one end to the inside of each chap, near the bottom hem. Sew the other end of the strap on the outside, so that you can adjust it with a buckle or other fastener.
Step 4: Dye the Leather
If desired, you can dye the leather chaps to add color and a finish. Choose a dye appropriate for use on leather and follow the instructions on the package. Allow the chaps to dry completely before wearing them.
Step 5: Wear Your Chaps
Once your chaps have been dyed and dried, you can wear them. Make sure to adjust the leg straps so that they fit comfortably. Enjoy your new leather chaps!
Additional Notes
When selecting leather for making chaps, choose a heavy-duty hide such as cowhide or buffalo hide. This will make the chaps more durable and longer lasting. To safeguard the leather from moisture and dirt, consider applying a waterproofing spray or sealer. Additionally, opt for heavy-duty thread when sewing to withstand the strain exerted on the seams by the leather chaps. By following these steps, you can ensure the longevity of your chaps for years to come! [2]
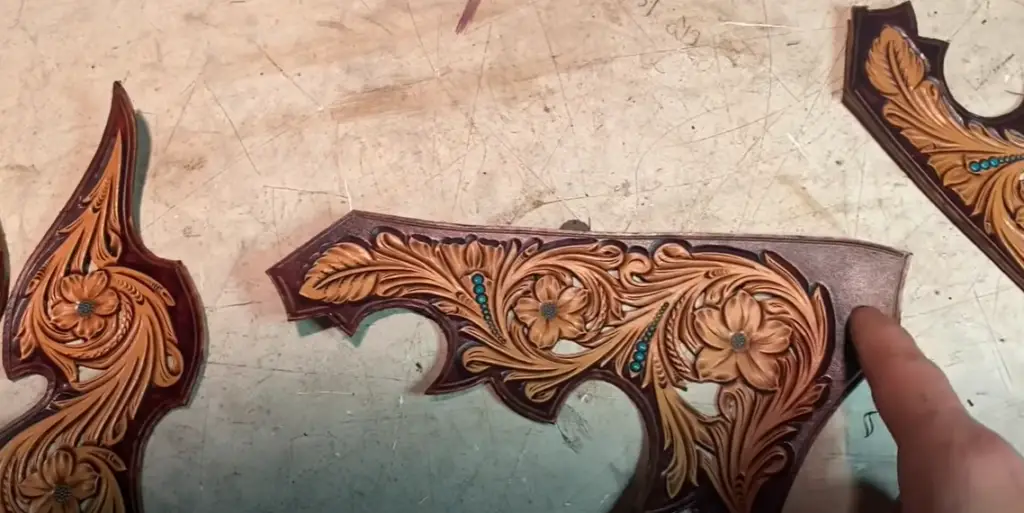
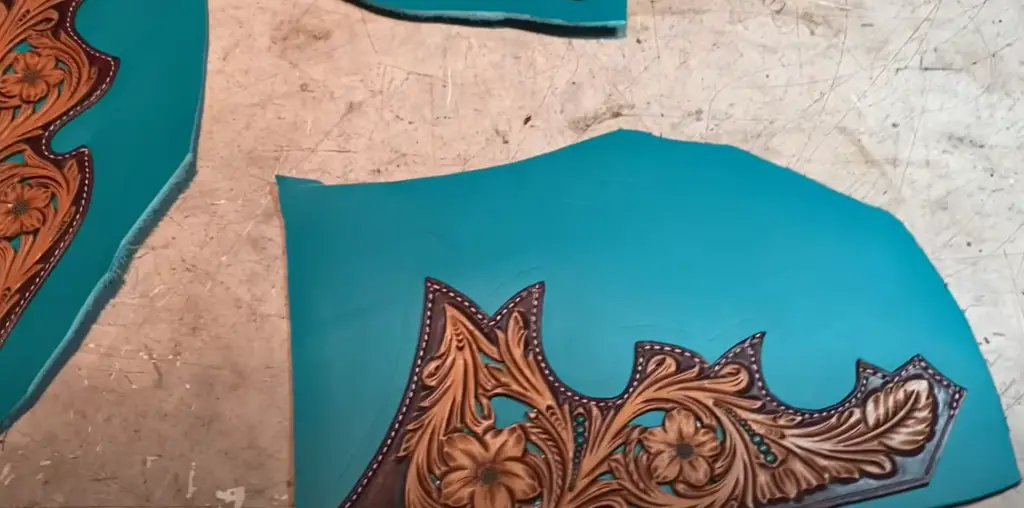
Choosing the Right Leather: Useful Tips
When selecting the right leather for making your chaps, there are a few tips and tricks that you should keep in mind. First, look for thick hides such as cowhide or buffalo hide. These will provide the most durable results. You may also want to choose a waterproof leather, which is treated with a protective coating to make it resistant to moisture and dirt. Finally, make sure to select leather in a color that you like. Dyeing your chaps is an option, but it’s much easier to find the right shade of leather in the first place! With these tips in mind, you’ll be able to find the perfect leather for your custom chaps.
Tips and Tricks for Making Leather Chaps
Making custom leather chaps can be a daunting task for the beginner. Here are some tips and tricks that you can use to make sure your chaps come out looking their best:
- Use heavy-duty thread when sewing – this will ensure that the seams hold up to wear and tear.
- When marking the leather pieces, use an awl or punch tool rather than a marker. This will create small, precise holes that will be easier to sew through.
- Before dyeing the leather, make sure to test the dye on a scrap piece of leather first. This will allow you to see how the color looks and adjust if necessary.
- Apply a waterproofing spray or sealer when finished. This will protect the leather from moisture and dirt.
- When adding leg straps, make sure to adjust them so that the chaps fit comfortably.
By following these simple tips, you’ll be able to create a pair of custom leather chaps that look great and last for years!
Caring for Your Leather Chaps
Leather chaps require special care to ensure that they last for a long time. Here are some tips on how to properly care for your chaps:
- Immediately after wearing, brush the leather with a soft brush to remove dirt and dust.
- Apply a leather conditioner every few months to keep the leather supple and prevent cracking.
- Make sure to let the chaps air dry after cleaning them, as drying them with a heat source can damage the leather.
- If your chaps become wet, let them air dry naturally and avoid exposure to direct sunlight or other heat sources.
- Store your chaps in a cool, dark place when not in use.
- Avoid contact with abrasive surfaces such as concrete or rocks, as these can scratch the leather. [3]
Maintenance of Leather Chaps
Leather chaps are an investment, and it’s important to care for them properly if you want them to last. Here are a few tips on how to take the best possible care of your leather chaps:
- Make sure to keep the chaps dry at all times. If they become wet or damp, allow them to air-dry before storing them away.
- Use a damp cloth to clean the leather and remove any dirt or debris from the surface. Do not scrub too hard, as this can damage the leather.
- Condition leather chaps regularly with a good quality saddle soap or conditioner meant for use on leather products. This will help keep the material soft and supple, while also protecting it from dirt and moisture.
- Store leather chaps in a cool, dry place. Do not hang them anywhere that they will be exposed to direct sunlight as this can cause the material to fade or crack.
- Keep the chaps away from any heat sources, such as radiators or fireplaces, as this can also damage the leather over time.
- If your chaps get wet, use a soft cloth to wipe off any excess moisture and then allow them to air-dry. Do not dry the leather with direct heat or put them in the dryer as this can cause them to shrink or warp.
By following these tips, you can keep your leather chaps looking good for years to come! [4]
Pros and Cons of Leather Chaps
While leather chaps provide great protection and style, there are a few downsides to consider before making your purchase. Here are some of the pros and cons of owning leather chaps:
Pros:
- Leather is naturally durable and resistant to tears and abrasions.
- Leather also provides excellent insulation from cold temperatures, so you’ll stay nice and warm while riding in cold weather.
- Leather chaps are stylish and can be customized to fit your taste. [5]
Cons:
- Leather is not waterproof, so you’ll need to take extra care if you ride in wet conditions.
- Leather requires regular maintenance such as conditioning, cleaning, and repairs when necessary.
- Leather chaps can be expensive depending on the quality and design. [6]
FAQs
What materials do I need to make leather chaps?
You’ll need a few key materials to make leather chaps. You will need some form of heavy weight leather, such as cowhide or goatskin. You’ll also need thread, scissors, and an awl for punching holes in the hide. Other tools you may find useful include a rotary cutter and ruler or metal straight edge to cut the leather pieces accurately, and an edge beveler to finish the edges.
How should I measure for leather chaps?
When measuring for leather chaps, it’s important to take accurate measurements in order to get a perfect fit. To start off, you’ll need your waist measurement, hip measurement (at the widest point), thigh circumference (at its widest point) and overall length from the waist down. Once these measurements have been taken, you can use them to create a pattern that will be used to cut out the pieces for your leather chaps.
What type of leather should I use?
The best type of leather to use when making chaps is heavy weight cowhide or goatskin. These types of leather are durable and long lasting, and will not stretch or shrink over time. They also have a natural resistance to moisture, which is important when working with leather.
How should I sew the pieces together?
When sewing the pieces of your leather chaps together, it’s best to use a heavy duty thread and an awl for punching holes in the hide. You can either use a saddle stitching technique, which involves two needles going in opposite directions through each hole to create a secure seam, or you can use a machine stitch. Whichever method you choose, make sure that the seams are pulled tight and secured with a knot at either end.
How can I finish off my leather chaps?
Once all of your pieces have been sewn together, you can finish off your chaps by adding rivets, snaps or buckles to the seams. This will help to keep them secure and provide extra strength. You may also want to use an edge beveler to give the edges a smooth finish and add an aesthetic touch. Finally, you can apply leather conditioner or wax to help protect the leather from wear and tear.
How do I maintain my leather chaps?
In order to keep your leather chaps in top condition, you should regularly apply a leather conditioner or wax. This will help protect the hide from dirt and moisture, and will also prevent it from drying out too quickly. You should also avoid exposing your chaps to direct sunlight, as this can cause the leather to fade and crack over time. Additionally, make sure to keep your chaps clean by wiping them down with a damp cloth after each use. This will help maintain their appearance and prolong their lifespan.
What tips do you have for making leather chaps?
When making leather chaps, it’s important to take your time and be as precise as possible with your measurements and stitching. Make sure to use heavy duty thread and an awl for punching holes in the hide, as this will ensure that your seams are secure and won’t come undone easily. Finally, don’t forget to finish off your chaps by adding rivets, snaps or buckles, and be sure to apply a leather conditioner or wax regularly to maintain their appearance and lifespan.
What other projects can I make with leather?
Leather is a versatile material that can be used to create a wide range of items, such as wallets, belts, bags, purses and even furniture. You could also use it to make jewelry or clothing items such as jackets and vests. With the right tools and techniques, you can create almost anything with leather. Just remember to use heavy weight hides for any projects that require extra strength and durability.
What are some of the advantages of using leather?
Leather is a highly durable material that will last for many years if cared for properly. It has a natural resistance to water and dirt, and is also relatively easy to clean. Leather is also quite malleable, so you can shape and form it into almost any desired shape or size. Additionally, leather has a classic look that never goes out of style, making it the perfect material for crafting timeless pieces. Finally, leather is a sustainable resource that is easy to source in many parts of the world.
What safety precautions should I take when working with leather?
When working with leather, it’s important to take safety precautions such as wearing protective gloves and glasses. Leather can be quite sharp in some places, so you want to make sure that your hands are covered at all times. Additionally, make sure to use a proper cutting tool such as a rotary cutter or scissors for accurate cuts, and never use a sharp knife as this can be dangerous. Finally, wear a dust mask when sanding or buffing the leather to avoid inhaling any particles that may be released from the hide.
How much leather is required to make a pair of chaps?
The amount of leather required to make a pair of chaps will depend on the size and shape you are looking for. Generally speaking, you’ll need around 1.5-2 square feet of leather for a standard pair of chaps. If you want to add any extra features such as buckles or pockets, then you may need more leather depending on the complexity and size of the design.
Can I use other materials to make chaps?
Other materials such as canvas or synthetic leather can be used for making chaps. However, these materials are not as durable and may not last as long as genuine leather. If you’re looking for a pair of chaps that will stand up to heavy wear and tear, then you should stick with genuine leather. Additionally, synthetic materials may not have the same look and feel as genuine leather, so you may want to consider this before making your final decision.
Can I make chaps without a pattern?
Yes, it is possible to make chaps without a pattern. It will require a bit of trial and error in order to get the right shape and size, but it is doable. If you’re feeling confident in your leatherworking skills, then you can use tailor’s chalk to sketch out the pieces on your leather and cut them by hand. However, if you don’t feel comfortable with this method, then you should opt for using a pattern as it will make the process much easier and efficient.
What tools will I need to make leather chaps?
Some of the most basic tools you’ll need for making leather chaps include an awl, heavy duty thread, scissors, a rotary cutter and some rivets or snaps. If you have access to more advanced tools such as a sewing machine or edge beveler, then these can also come in handy. Additionally, you may want to invest in a leather conditioner or wax for extra protection and shine. All of these items can be purchased from most craft stores or online retailers.
What other projects can I make with leather?
Leather is a great material for making many different types of items such as wallets, bags, belts, jewelry and furniture. You could also use it to make clothing items such as jackets, vests or hats. Furthermore, leather can be used to create a variety of artwork such as masks, sculptures and wall hangings. With the right tools and techniques, you can craft almost anything with leather. Just remember to use heavy weight hides for any projects that require extra strength and durability.
Useful Video: How To Make Custom Chaps (Part 1)
Conclusion
Leather chaps can be a great addition to any wardrobe. They are a stylish and timeless piece of clothing, as well as being incredibly practical. To make your own leather chaps, you must first source high quality leather for the project. It is important to select the right pattern and size, as well as the hardware needed to complete the project. Once all of the materials are gathered, you can begin to assemble the chaps and add any finishing touches. With patience and attention to detail, you can make your own leather chaps that will last for many years.
References:
- https://www.ehow.com/how_5009071_make-leather-chaps.html
- https://www.instructables.com/how-to-make-leather-chaps/
- https://equinewebdesign.com/sew-your-own/patterns-for-chaps-chinks.html
- https://www.amazon.com/Custom-Leather-Chaps-Perfectly-Step-ebook/dp/B07KNPHR26
- https://oureverydaylife.com/how-to-make-custom-chaps-12162240.html
- https://westerntrailrider.com/wordpress/blog/2014/06/finished-my-first-pair-of-chaps/