Making a leather knot bracelet is an easy and fun craft project to do at home. Adding unique style to your wardrobe is one of the great benefits of using it! With just a few simple materials, you can make a beautiful piece of jewelry that will last for years. In this guide, we’ll walk you through the steps required to create your own knotted leather bracelet.
From selecting the right type of leather cord and fastening hardware, to tying the knots in place, we’ll help you put together an eye-catching accessory that’s sure to be admired by all who see it!
What You’ll Need
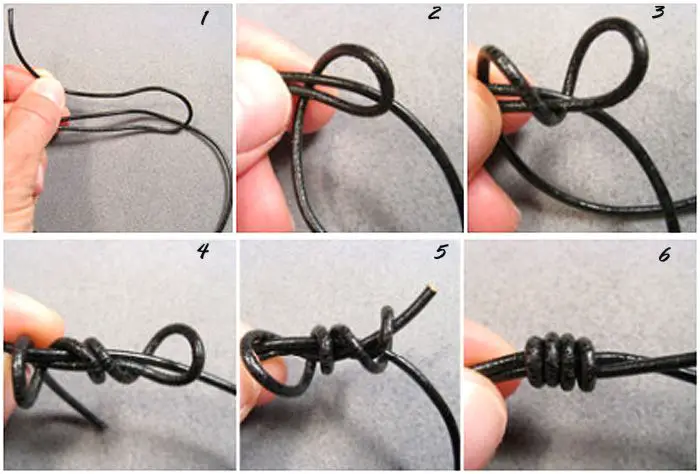
Before you get started, make sure you have the following materials on hand:
- Leather cord
- Fastening hardware (such as a buckle or clasp)
- Scissors
- Measuring tape or ruler
- Decorative beads and charms
Adjusting The Knots
After tying the first knot, you need to adjust the two sides of the leather cord so that they look balanced. Hold the bracelet and pull both ends away from each other until it is taut. If one side has more slack than the other, simply adjust it until it looks even. After adjusting both sides, tie your second knot and repeat the same steps until you have reached your desired length. Once you are satisfied with the length, tie a few more knots for additional security and to keep the bracelet from coming undone.
Bracelet Ideas
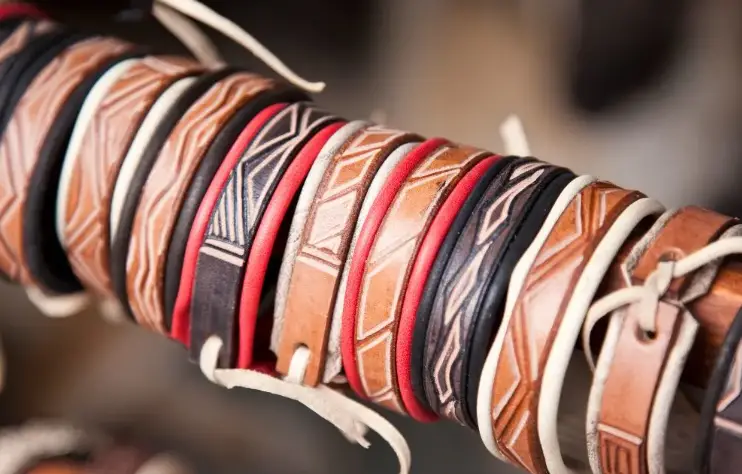
Making your own leather knot bracelet is a fun and easy way to create a truly unique accessory. In addition to making custom pieces from scratch, there are also plenty of ideas that you can use as inspiration or even copy exactly. Different knots, patterns, and styles offer endless possibilities for creating the perfect bracelet! [1]
Gather Your Cord And Begin Looping
Before you can begin tying your knots, you will need to have all of your supplies handy. You will need two small clasps or buttons, a pair of scissors, and some 1mm leather cord in the color of your choice. Start by cutting a length of cord that is twice as long as the finished bracelet should be.
If you are making a bracelet for an adult, the cord should measure approximately 18 to 20 inches.
Wrap Three Loops
The step in making a leather knot bracelet is to wrap three loops. Start by taking one end of the leather strip and wrapping it around the other end three times to form three even loops. To make sure that the loops are even, count them out loud as you go along. When done correctly, you should have three identical-sized loops.
Insert Cord End Through The Loops
Once you have the leather cord and two jump rings ready, it’s time to start creating your own bracelet! Begin by carefully inserting one end of the cord through both loops of the jump ring. This will help keep your parts together as you work. [2]
Pull The Cord End Through The First Loop
Once you have the leather cord folded and secured, take your second piece of cord (the one that has not been cut) and thread it through the first loop. Pull this end of the cord all the way through so that the two ends are even in length. Take care to ensure that both cords are not twisted before you begin knitting.
Adjust And Tighten The Knot
After tying your bracelet, you need to adjust and tighten it up. It is important to do this properly so that the knot won’t loosen or come undone with wear. To do this, start by pulling gently on each side of the knot until it feels snug and secure but not too tight. Next, use a toothpick or tweezers to arrange the knot so that it’s symmetrical and looks even. Once you’ve arranged your knot, use a leather punch or sharp scissors to poke small holes on each side of the knot. This will help keep everything in place and make sure the knot does not slip out of place.
Finally, thread a needle through each hole and tie the ends together to secure the knot.
Continue Tightening The Knot
Once the knot is tied, begin tightening it. Pull the string in both directions so that each loop is tightened around the other one and secured. To make sure you have a secure knot, pull on either side of the bracelet and tug firmly to ensure it’s tight.
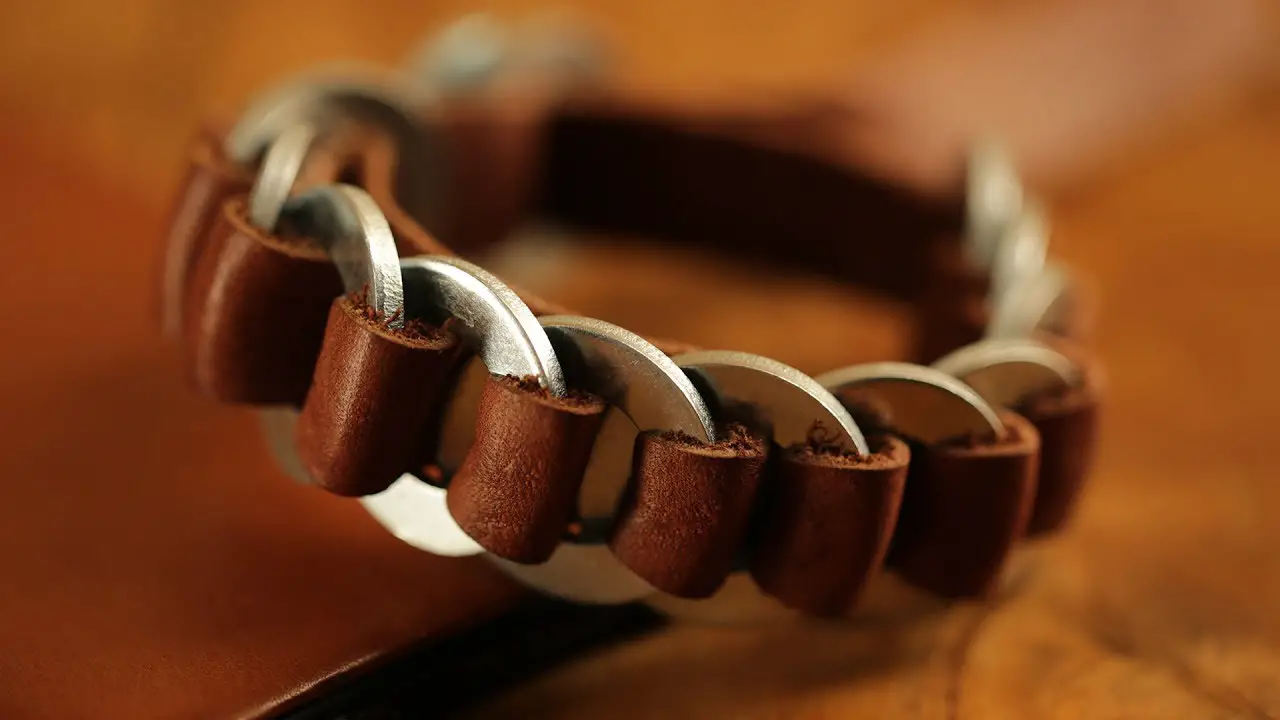
Once your knot is secure, tie off the end of the strings with a bow. This will keep your knot from coming undone when you are wearing the bracelet. [4]
Using The Sliding Knots For An Adjustable Bracelet Or Necklace
The sliding knot technique is the perfect way to make an adjustable bracelet or necklace. To do this, you will need two cords that are cut to your desired length. The length of the cord should be slightly longer than the circumference of your wrist or neck, so that it can be adjusted easily.
Now take one cord and place it over the other. Secure the ends of both cords by forming a loop and then insert the end of one cord into the loop. Pull it tight to form a secure knot. Take the second cord and slide it through the first knot, creating a sliding knot effect. Pull each side of the cords tightly to create a firm hold, and your adjustable leather bracelet or necklace is ready! You can also use this technique to add a decorative element to the bracelet, such as beads or charms.
Adjusting The Knots
Once the knots have been made, they can be adjusted to get the desired length and look of the bracelet. To adjust a knot, loosen it slightly by slowly pulling apart each side in opposite directions. Once the desired tension is achieved, tighten it again by pushing the strands together and pressing firmly until the knot stays in place.
Bracelet Ideas
Once you’ve learned the basics of making a leather knot bracelet, there are plenty of other ideas to explore. Here are some ways you can customize your bracelet:
- Change up the colors – try using different shades and tones of leather strips for a unique look!
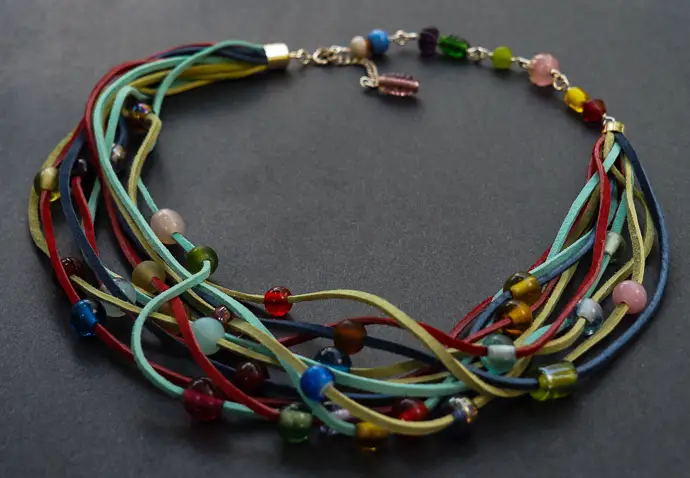
- Add charms or beads to the knots for extra flair.
- Consider using alternative materials like suede or synthetic leather to have a distinct texture instead of only using leather.
- You can create a unique look for your bracelet by trying out various knot styles.
- For an extra special touch, try hand painting or stamping the leather strips before you start tying knots. [4]
FAQ
How do you make a knot bracelet?
Creating a bracelet with a leather knot is a straightforward process. You just need to have thin, high-quality leather cord and some basic supplies. To begin, measure your wrist and then cut the cord to the length that you desire. Next, make an overhand knot with the cord and secure it around your wrist. Ensure that you leave sufficient extra length for the purpose of making additional knots at a later time. After that, make an overhand knot on the opposite end of the cord and adjust it by sliding it towards the wrist knot. To secure the two ends together, use a lark’s head knot.
This can be done by looping one end through the other. To bracelet one-of-a-kind, personalize it by adding diverse beads or charms.
How do you tie the end of a leather bracelet?
After cutting your leather bracelet to the desired length, there are various methods to tie the end of it. The Square Knot is the most commonly used knotting technique. The knot that has been used for centuries is well-suited for leather material due to its ability to avoid slipping or breaking easily. You can adjust the knot to make it tighter or looser based on how you want it to fit.
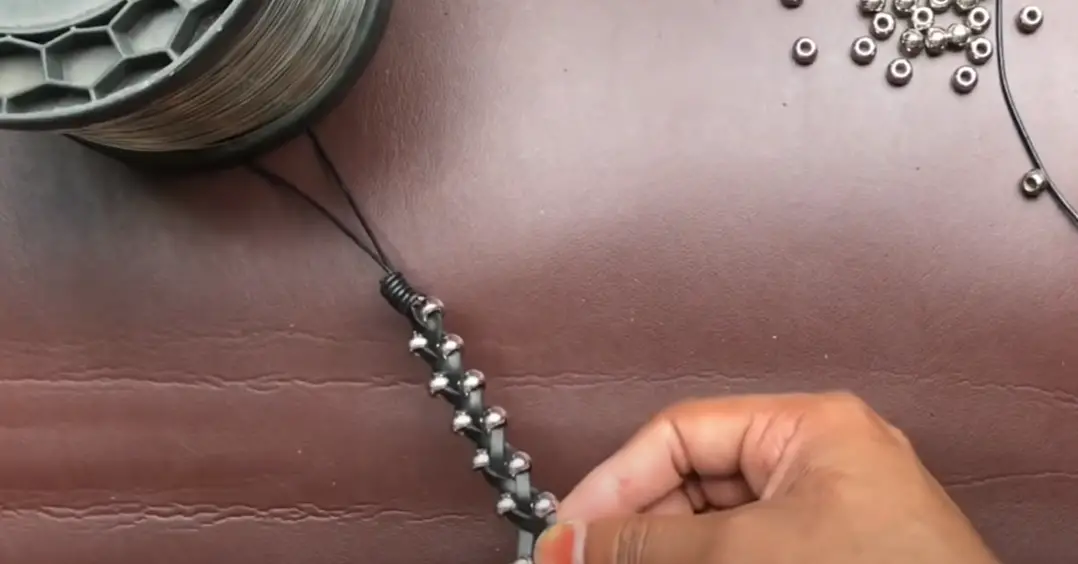
In order to tie a square knot on your leather bracelet, you’ll require two ends of equal length and a string or cord with a loop.
Grasp the leather with both hands, positioning the right hand above the left. To begin, take the end of the leather on the right and cross it over to the left side.
Next, take the end of the leather on the left and cross it over to the right side. To achieve your desired fit, tighten both ends. To tie off your leather bracelet, you may use a simple knotting technique known as a Sliding Knot.
How do you tie a leather wrist bracelet?
Start by cutting the leather to your desired length before tying it into a wrist bracelet. To account for the folding in half, please multiply this measurement by two. Create an overhand knot at one end of the cord and ensure that the two strands are tightly fitted together. Next, take one strand and thread it through the other strand to create a loop.
Thread the remaining strand through the loop, then pull both strands tightly to create a knot. Next, make three more knots on top of one another until you have created a secure knot. After trimming the excess leather from the ends, your new leather wrist bracelet is ready to be worn!
The amount of knots you use will depend on the length of your leather and the thickness of the strand. To ensure the security of a thicker strand, a higher number of knots may be necessary. To make your bracelet stand out, try using various types of knots like the square knot.
How do you make a knot bracelet for beginners?
This craft project of making a knot bracelet is fun and suitable for all skill levels. Here are the steps to make a classic leather knot bracelet:
- Please cut two pieces of leather cord that are twice the length of the desired bracelet size. For example, if you want your finished bracelet to be 6 inches (15 cm) long, you should cut each of your leather cords to at least 12 inches (30 cm).
- Make an overhand knot to join the two pieces of leather cord together, while ensuring to leave a small loop. To make it easier to tighten the bracelet when finished, ensure that the loop is not too big.
- Insert one end of the leather cord into the loop and then tighten it by pulling it. Adjust the size of the knot so that it fits snugly around your wrist.
- Separate the two pieces of leather cord, and begin making a series of half hitch knots down each side, alternating between cords for each knot.
- When you reach the end, tie an overhand knot with the two pieces of leather cord and pull it tight. Trim any excess cord to give a neat finish.
How do you make a Celtic leather knot?
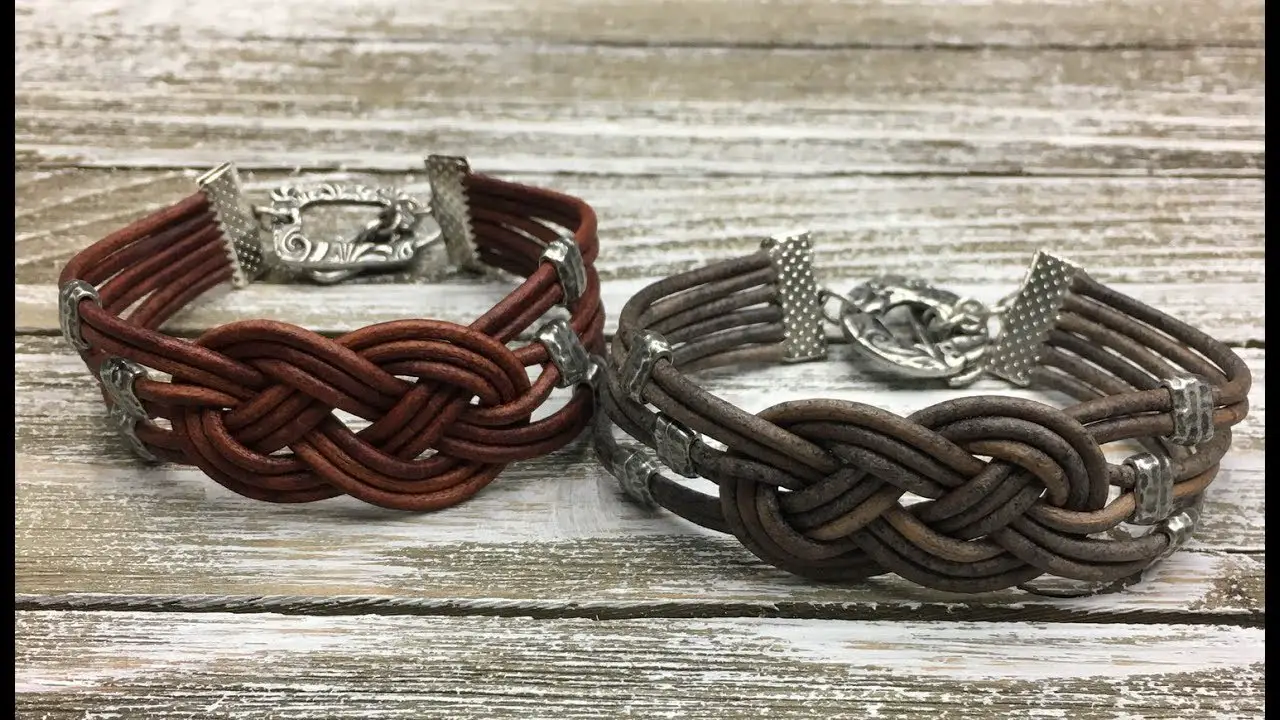
Making a Celtic leather knot is an easy and fun way to create your own stylish jewelry. The best part about this project is that it doesn’t require any special tools or supplies – just some scrap leather, a few lengths of cord and your creativity. Here’s what you need to do:
- Cut two pieces of leather cord to equal lengths. They should be approximately 20-25 cm long.
- Take one piece of cord and fold it in half so that the ends are touching. Make a loop with the folded end around your thumb and hold it firmly in place.
- Take the remaining cord and pass it through the loop you previously created, starting from the back of your thumb and coming out through the front. Pull until the ends are even and secure with a knot.
- Take one end of the cord and make another loop around your thumb in the same manner as before.
- Take the other end and insert it into the loop from the front to the back instead of the back to the front. Make sure that the two loops you’ve made are even and secure the knot.
- Tighten both knots until your bracelet is snug around your wrist.
- Once you remove any extra cord, your task is complete.
What are leather 7-knot bracelets?
Leather 7-knot bracelets are a popular DIY project and can be made with just a few simple items. The knots in the bracelet represent the seven principles of Kabbalah – love, unity, justice, peace, mercy, humility and charity. The weaving of leather strands creates an eye-catching design that is both stylish and meaningful. Also known as wish bracelets, these can be made with any color cord and are a great way to make an inexpensive, personal gift.
How do you tie a forever knot bracelet?
Creating a forever knot bracelet is a great way to make your own custom piece of jewelry. It’s simple to do and only requires a few simple materials. To begin, you will need a leather cord cut into two equal lengths, with one piece slightly longer than the other. You’ll also need scissors and glue.
Start by tying a basic overhand knot at one end of the two pieces of. Make sure that the tails extend away from each other.
Afterwards, you should make another overhand knot close to the end of the shorter cord and ensure it is firmly tightened against the first knot that was made. You should now have a loop on one side and two long tails on the other. Take one tail of the longer piece and slide it through the loop created by the knots. Then pull it out again, keeping its original orientation.
Slide the same tail back the loop once more, this time in reverse from its previous direction so that it crosses over itself – creating an X-shape. Pull the tail tight to create a second loop.
Now take the other long tail of the longer piece and slide it into this loop, making sure to keep its original orientation. Pull it out again and then slide it back into the loop in reverse from its previous direction so that two X-shapes are formed.
Finally, pull both tails tight to secure the knot. You will now have a forever knot bracelet.
Useful Video: Mens DIY Beaded Leather Knot Bracelet, Handmade Gift for Dad
Conclusion
Once your leather knot bracelet is completed, you can start wearing it with pride. If you want to add a bit of extra flair, consider adding some charms or beads to the ends of the strings. You could also use different colors of leather for an interesting design.
However you choose to wear it, enjoy your handmade leather knot bracelet!
References
- https://www.kernowcraft.com/jewellery-making-tips/beading-and-threading-techniques-and-advice/how-to-make-a-sliding-knot
- https://artisanalpanda.com/leather-josephine-knot-bracelet-tutorial
- https://www.ehow.com/how_6245816_make-knots-leather-cord-bracelet.html
- https://www.wikihow.com/Make-Leather-Bracelets



Leave a Reply