Leather gauntlets can be a great addition to your medieval wardrobe, or just something fun to make for yourself. In this comprehensive guide, we will answer all of the most common questions people have about how to make leather gauntlets. We’ll start with the basics, like choosing the right leather and tools, and work our way up to more advanced techniques like shaping and stitching. So whether you’re a beginner or an experienced leatherworker, this guide has something for everyone!
What Are Gauntlets?
Gauntlets are gloves that extend to cover part of the forearm. They were common in medieval times and are still worn today by some reenactors, SCA members, and LARPers. They can also be found in some modern fashion collections.
Gauntlet-style gloves were often worn by knights and other soldiers to protect their hands and lower arms from injury. The word “gauntlet” comes from the Old French word “gantelet”, which means “little glove”.
Today, gauntlets are not as functional as they once were, but they can still add a touch of flair to your outfit. If you’re interested in making your own leather gauntlets, read on! [1], [6]
Differences Between Gloves and Gauntlets
There are a few key differences between gloves and gauntlets. First, gauntlets are usually made of heavier materials than gloves. This is because they need to provide more protection than gloves.
Second, gauntlets extend further up the arm than gloves. They typically cover the forearm, whereas gloves only cover the hand.
Third, gauntlets don’t provide compression like gloves. This means that they don’t fit as snugly to your fingers as gloves do.
Finally, gauntlets often have additional features like plates or straps that help to secure them in place on the arm. [2]
Types of Gauntlets
There are a few different types of gauntlets that you may encounter.
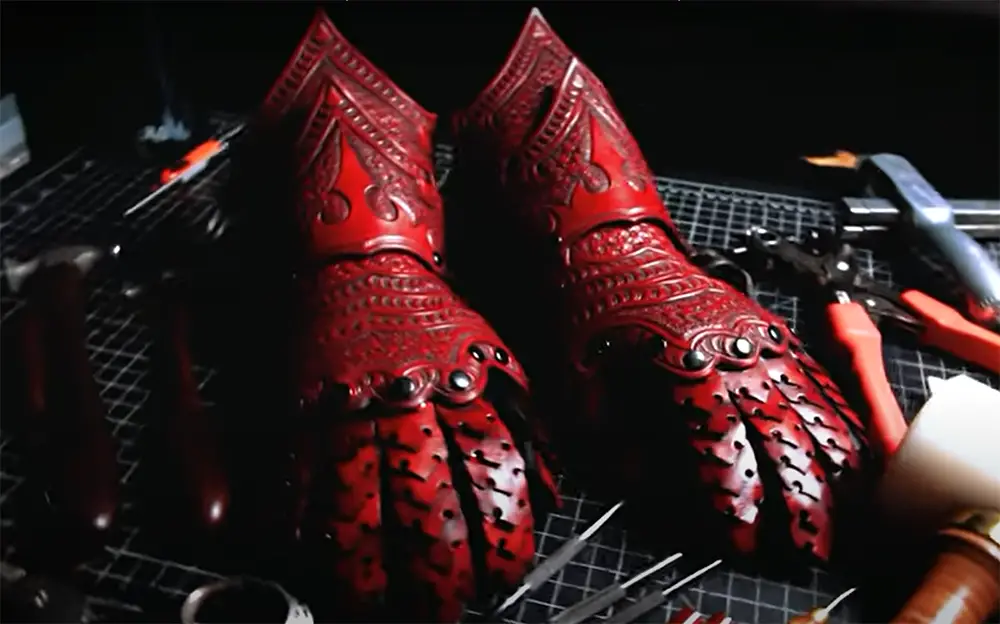
Medieval style gauntlets
The first type of gauntlet is the medieval style gauntlet. These are the kind of gauntlets that you typically think of when you hear the word “gauntlet”.
They are made of thick leather and often have metal plates or scales sewn onto them. They extend from the wrist to just below the elbow, and they usually have a lacing system or straps that help to secure them in place.
Medieval style gauntlets are great for anyone who wants a bit of extra protection for their hands and arms.
Wrist gauntlets
The second type of gauntlet is the wrist gauntlet. These are similar to medieval style gauntlets, but they only cover the wrist and part of the hand.
They are usually made from the same kind of thick leather as medieval gauntlets, and they often have less elaborate lacing or strap systems.
Wrist gauntlets are a good choice for people who want the look of a gauntlet without the extra weight or bulk. They are also a good choice for people who want more dexterity in their hands than a full gauntlet would allow.
Motorcycle gauntlets
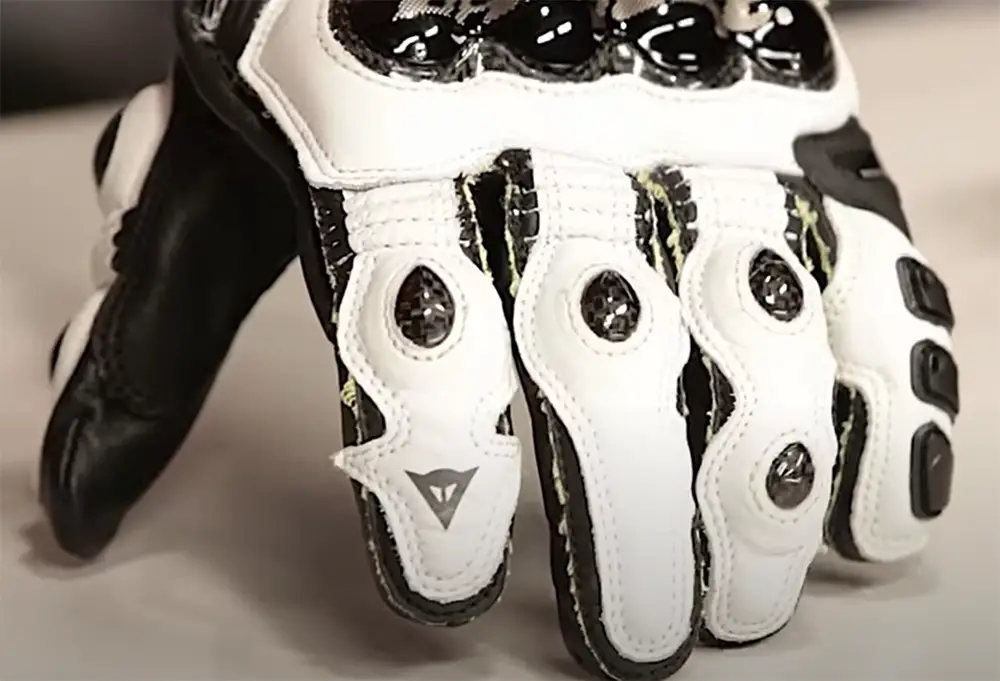
Motorcycle gauntlets are designed to protect the hands and lower arms from wind, sun, and debris while riding a motorcycle. They are usually made of leather or another sturdy material. Some motorcycle gauntlets also have padding to help absorb vibrations from the road. [3]
What Leather Should You Use for Leather Gauntlets
There are many types of leather, but not all of them are suitable for gauntlet-making. You’ll want to use sturdy, yet flexible leather so that your gauntlets can withstand plenty of wear and tear. Thickness is also important – you don’t want your gauntlets to be too thick and bulky, as this will make them difficult to move in. Ideally, you should look for a leather that is around three to four ounces thick.
Some good options for leather gauntlet-making include cowhide, buffalo hide, and pigskin. These all have the necessary durability and flexibility that you need, while still being relatively thin. If you can’t find any of these types of leather, ask your local cobbler or leatherworker – they’ll be able to point you in the right direction. [4], [5]
Gather the Materials You’ll Need
Once you’ve chosen your leather, it’s time to gather the rest of the materials you’ll need.
We have covered what kind of leather you will need for the task. But there are some other materials you will need to have on hand as well.
These include:
- A heavy duty sewing needle;
- Hole punch;
- Heavy duty thread;
- Leather dye;
- Scissors or a knife;
- A ruler or measuring tape;
- A paper;
Take Measurements and Cut Out the Pieces
Now that you have all of your materials, it’s time to start working on your gauntlet pattern.
Before you begin, you’ll need to take some measurements. First, you’ll need to take measurements of the thickest part of your arm, just above the elbow.
You’ll also need to measure: the circumference of your wrist, top length of your forearm, distance between your hand and knuckle, and the distance between wrists and knuckles. [4]
Draw the Pattern on the Paper
Once you have all of your measurements, it’s time to start drawing the pattern on the paper. Before you begin, you will need to adjust some measurements first. To do so, divide the thickest circumference of the forearm, wrist circumference and top length of your hand by 2.
Draw a straight vertical line based on the length of your forearm. Then, from the middle of that line, draw a line towards the right based on the top length of your hand.
Then, measure down the original line based on the length between knuckles and wrist and draw a line perpendicular to it. This line should meet the wrist circumference.
Don’t forget to repeat the same for the other side to complete the full pattern. Once you’re happy with your result, cut it out so that you have a template for your leather gauntlet. [4]
Transfer the Pattern onto Your Leather
Now it’s time to transfer the pattern you just created onto the leather.
You can do this in a few different ways, but the easiest is probably to use chalk or a pencil to trace around the pattern piece. Keep in mind that for the second gauntlet, you will need to mirror the image.
When you’re transferring the pattern, be sure to add a little extra 1.5 inch around the edges for seam allowance. [4]
Cut out the leather pieces
After you have traced your pattern onto the leather, it’s time to start cutting it out. Use your scissors to cut out pieces of leather according to your template.
When you’re finished cutting out the pieces, set them aside until we’re ready to start assembling them.
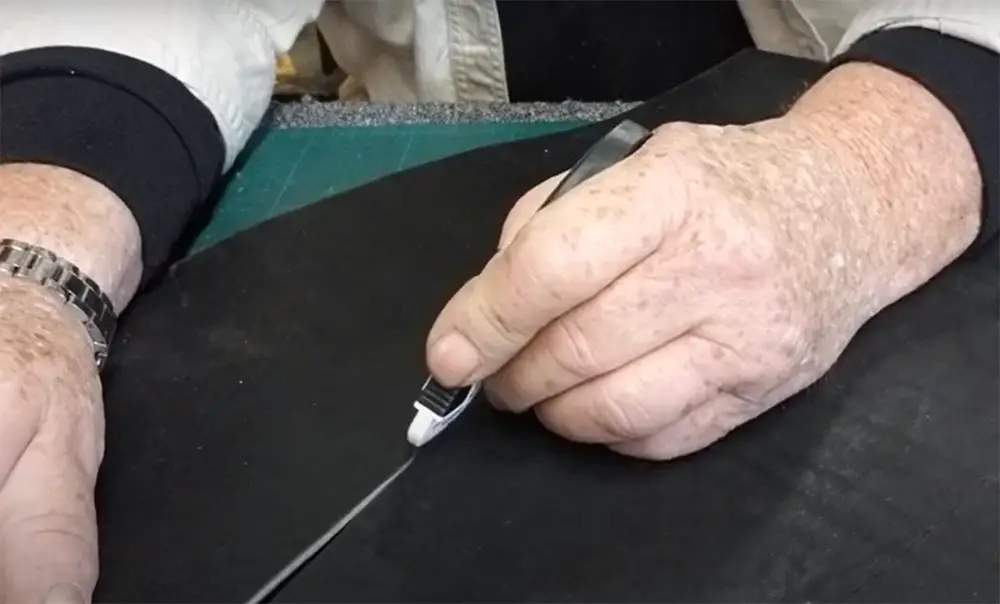
Clean Up the Edges
Now that you have your leather gauntlet pieces cut out, it’s time to clean up the edges. You can do this with a rotary cutter, but a sharp knife will work just as well. Just be careful not to cut yourself! Once you have all of the edges trimmed, it’s time to start working on the next step. [4]
Puncture holes for the lacing
The next step is to puncture holes for the lacing. To do this, you will need to use a sharp object like a hole punch or a needle.
Color the Leather
The next step is to color the leather, if you so desire. This is entirely up to you, and you can skip this step if you want your gauntlet to be au natural. You can use any kind of leather dye or stain that you like. Just be sure to follow the instructions on the bottle!
Once you’re finished coloring the leather, set it aside to dry completely. This could take a few hours or even overnight, so be patient! [4]
When the leather is finally dry, it’s time to start assembling your gauntlet.
Lace your gauntlets together
The final step is to lace your gauntlets together. To do this, you will need to use a strong thread or cord. You can also use leather laces, if you prefer.
Thread your needle and start lacing the gauntlet from the bottom up. Be sure to pull the thread tight as you go!
Once you reach the top of the gauntlet, tie off the thread and trim any excess. Repeat this process for the other gauntlet, and you’re finished! [4]
Comparison of Indicators for Making Leather Gauntlets
The table below provides a comparison of various indicators related to making leather gauntlets, a type of protective handwear. These indicators include the material thickness, hand measurements, and the number of hours required to complete the gauntlet-making process. The table is presented in the imperial system for ease of understanding.
- Material Thickness (in inches): This column represents the thickness of the leather material used for crafting the gauntlets. Thicker leather provides more durability and protection, but it may also affect flexibility.
- Hand Measurements (in inches): This column includes the measurements of the wearer’s hand, such as the palm width, wrist circumference, and forearm length. These measurements are essential for ensuring a proper fit and comfort of the gauntlets.
- Hours to Complete: This column indicates the estimated number of hours required to complete the process of making leather gauntlets. This duration includes designing, cutting, stitching, and finishing the gauntlets. The time may vary based on the complexity of the design and the skill level of the crafter.
Please note that the values in the table are indicative and can vary based on individual preferences, techniques, and the availability of resources.
| Material Thickness (in inches) | Hand Measurements (in inches) | Hours to Complete |
|---|---|---|
| 0.08 | 7.5 (palm width), 7.0 (wrist circumference), 11.5 (forearm length) | 10 |
| 0.06 | 7.0 (palm width), 6.5 (wrist circumference), 11.0 (forearm length) | 8 |
| 0.1 | 8.0 (palm width), 7.5 (wrist circumference), 12.0 (forearm length) | 12 |
| 0.12 | 8.5 (palm width), 8.0 (wrist circumference), 12.5 (forearm length) | 14 |
In the above table, we have provided sample data for the comparison of indicators. Each row represents a specific gauntlet design with different material thicknesses and corresponding hand measurements. The “Hours to Complete” column denotes the estimated time required to make each gauntlet design.
FAQ
What are gauntlets made out of?
Gauntlets are made out of a variety of materials, including leather, cloth, metal, and even plastic. However, the most popular material for gauntlets is leather. Leather is durable and can be easily decorated with spikes or other embellishments.
How do you make cheap gauntlets?
The easiest way to make a cheap pair of gauntlets is to purchase some leather working tools and supplies, and then follow a tutorial. You can find many tutorials online or in leather working books.
Another way to make cheap gauntlets is to buy a pre-made pair of gloves or glove pattern, and then add the extra details to turn them into gauntlets. This will require less leatherworking experience and knowledge than making a pair from scratch.
What’s the difference between bracers and gauntlets?
Bracers are generally smaller and more form-fitting than gauntlets, which are larger and have more protection. Bracers can be made of different materials like leather, metal, or even cloth, while gauntlets are almost always made of heavier materials like leather, metal, or even Kevlar.
What tools do I need to make leather gauntlets?
To make leather gauntlets, you will need the following tools:
– Leatherworking mallet or hammer
– Leather cutting knife or rotary cutter
– Leather punches or awls
– Leather stitching needles
– Leather stitching thread
– Rivet setter and rivets
– Edge beveler and burnishing tool
– Leather dye or paint
– Leather conditioner
How do I choose the right leather for gauntlets?
When selecting leather for gauntlets, it’s important to consider its thickness, durability, and flexibility. Look for sturdy, medium to heavy weight leather that can withstand wear and tear. Vegetable-tanned leather is a popular choice as it can be easily shaped and molded. Also, ensure that the leather has a smooth and even surface for a clean and professional finish.
What are the basic steps to make leather gauntlets?
The basic steps to make leather gauntlets include:
1. Create a pattern or template for the gauntlet design.
2. Trace the pattern onto the leather and cut out the desired shape.
3. Use leather punches or awls to create holes for stitching or riveting.
4. Stitch or rivet the pieces together, leaving openings for the hand and wrist.
5. Bevel and smooth the edges of the gauntlet.
6. Dye or paint the leather to the desired color.
7. Apply a leather conditioner to protect and soften the leather.
8. Allow the gauntlets to dry thoroughly before use.
What stitching techniques can I use for leather gauntlets?
There are several stitching techniques you can use for leather gauntlets, including:
– Saddle stitch: This is a strong and durable hand-stitching technique that involves using two needles to sew through the leather layers, creating a double-threaded stitch.
– Running stitch: This is a simple stitch where the needle passes in and out of the leather, creating a visible line of stitches on the surface.
– Whip stitch: This stitch is commonly used for joining edges or seams. It involves passing the needle over the edge of the leather and then back through, creating a looped stitch.
– Lock stitch: This stitch provides additional security by looping the thread around previous stitches, preventing them from unraveling.
How can I add decorative elements to leather gauntlets?
To add decorative elements to your leather gauntlets, you can consider the following techniques:
– Tooling: Use leather carving tools to create intricate designs or patterns on the surface of the gauntlet.
– Embossing: Heat a custom metal stamp and press it onto dampened leather to create raised designs or logos.
– Dyeing or painting: Apply leather dyes or paints in different colors to create unique designs or patterns on the gauntlet.
– Stamping: Use metal stamps to impress designs or patterns onto the leather, creating a textured effect.
– Leather appliqué: Cut out shapes or designs from a different color or type of leather and attach them to the gauntlet using stitching or adhesive.
How do I ensure a proper fit for leather gauntlets?
To ensure a proper fit for leather gauntlets, you can follow these guidelines:
1. Measure your hand and wrist accurately to determine the size of the gauntlet pattern or template.
2. Consider the intended use of the gauntlets and any additional layers of clothing you may be wearing underneath.
3. Allow for some ease of movement by adding a small amount of extra space in the pattern.
4. Make a test or mock-up gauntlet using a cheaper material to check the fit before cutting into your leather.
5. Adjust the pattern or template as needed based on the test fit, making sure the gauntlet is neither too tight nor too loose.
What are some tips for finishing leather gauntlets?
To achieve a professional finish for your leather gauntlets, consider the following tips:
– Sand or smooth any rough edges before applying dye or paint to ensure a clean and polished appearance.
– Apply multiple thin coats of dye or paint, allowing each coat to dry before applying the next, to achieve a smooth and even color.
– Use a high-quality leather conditioner to soften and protect the leather from moisture and wear.
– Consider adding a decorative border or trim using a different color or type of leather.
– Pay attention to small details like stitching or rivet placement, ensuring they are evenly spaced and secure.
– Give the gauntlets ample time to dry and cure before using them to avoid smudging or damaging the finish.
Useful Video: How to make a gloves leather handmade PDF pattern
Conclusion
So, if you’re looking for a new project and want to try your hand at making some leather gauntlets, we hope this article has been helpful. Just remember to take your time with the measurements and patterns, and be patient as you work the leather. With a little practice, you’ll be able to make beautiful gauntlets that will keep your hands and wrists safe!
References:
- https://www.wise-geek.com/what-are-gauntlet-gloves.htm
- https://www.brightlifedirect.com/blogs/news/difference-glove-and-gauntlet
- https://www.libertyleathergoods.com/leather-gauntlets/
- https://www.instructables.com/How-to-work-with-Leather-A-Gauntlet-design/
- https://www.newpig.com/expertadvice/5-steps-to-choosing-a-leather-work-glove/
- https://www.medieval.eu/gloves-and-mittens-from-the-past/